
Easily Sharpen Your Image in Photoshop | Skylum How-to
Sometimes you might feel like your photos are too smooth or blurry. By sharpening them, you can add contrast along the edges of objects. Make your subject more prominent and dramatic and add volume by learning how to sharpen an image in Photoshop.
Are you looking for how to fix blurry pictures? Photoshop can do wonders and help you achieve the best results with your photography. At the same time, it’s complicated and hard to master because of its many features. If you’re looking for an alternative, Luminar is editing software that can help you sharpen your image and give it wonderful effects quickly and easily.
Mục lục
How to Sharpen an Image in Photoshop
Almost any photo will benefit from a little sharpening, as it adds contrast. However, it’s important to know your photo’s limits and not to overdo it.
Here’s the quickest and easiest way to sharpen images in Photoshop:
1. Open your image in Photoshop.
2. Select the photo layer in the Layers panel and navigate to the Filter menu. Choose Convert for Smart Filters so you can sharpen without permanently changing the photo.
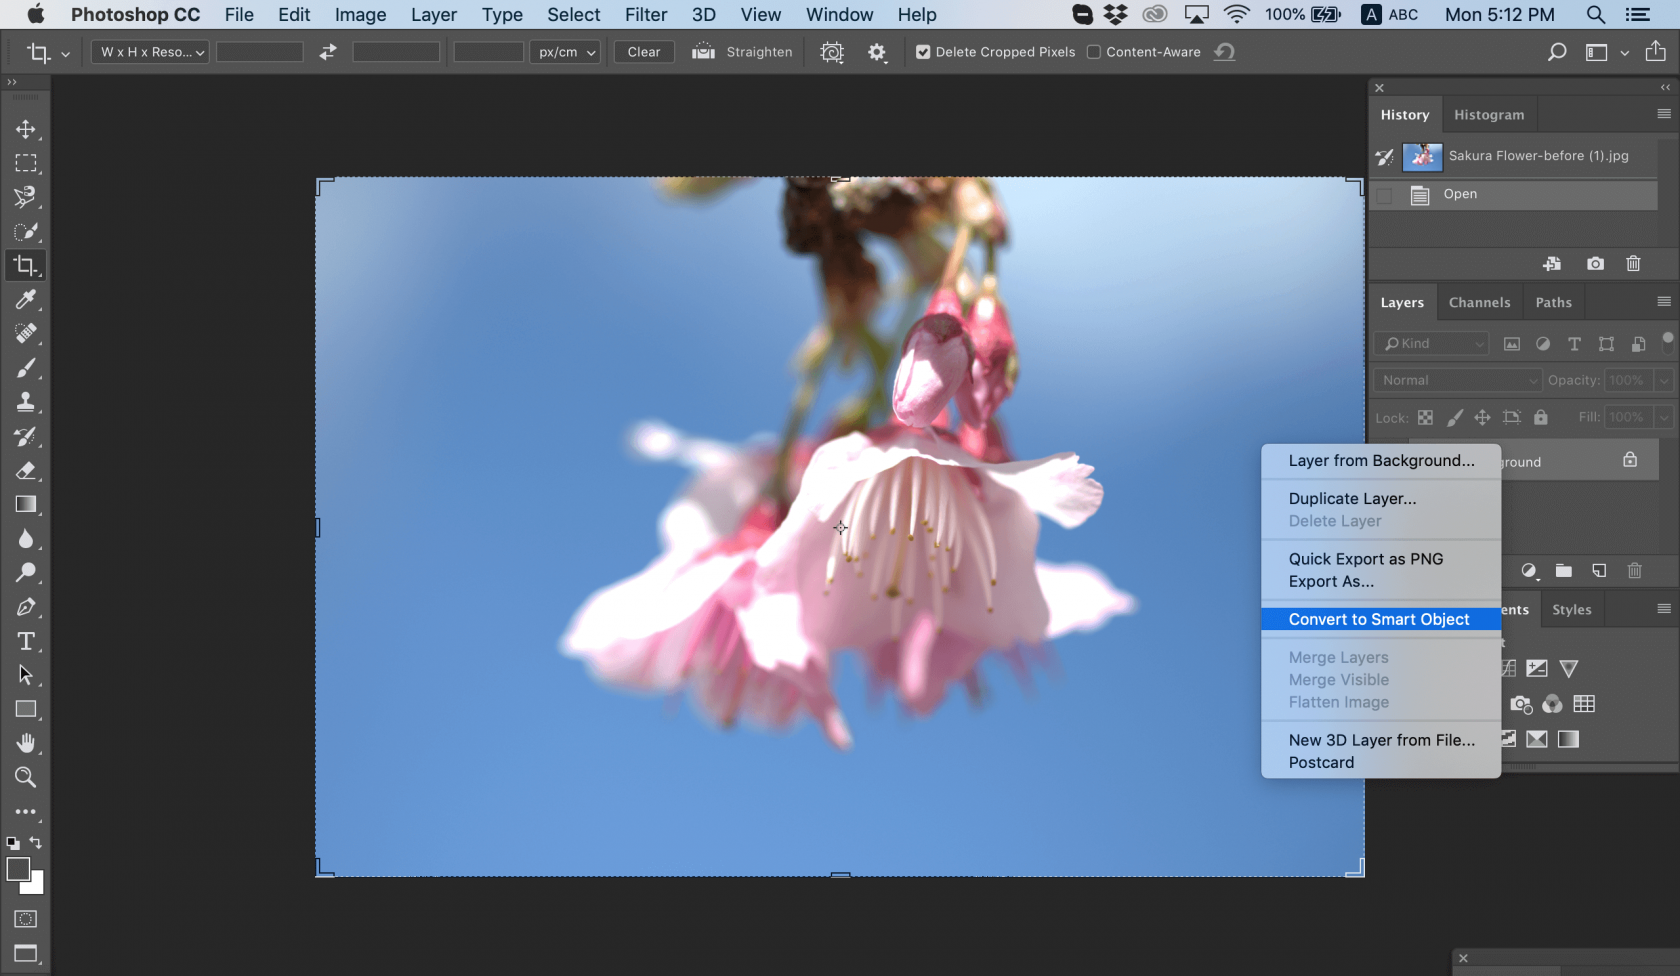
Photo by
Chris Willson
3. Apply the Unsharp Mask filter.
4. In the Filter menu, choose Sharpen > Unsharp Mask.
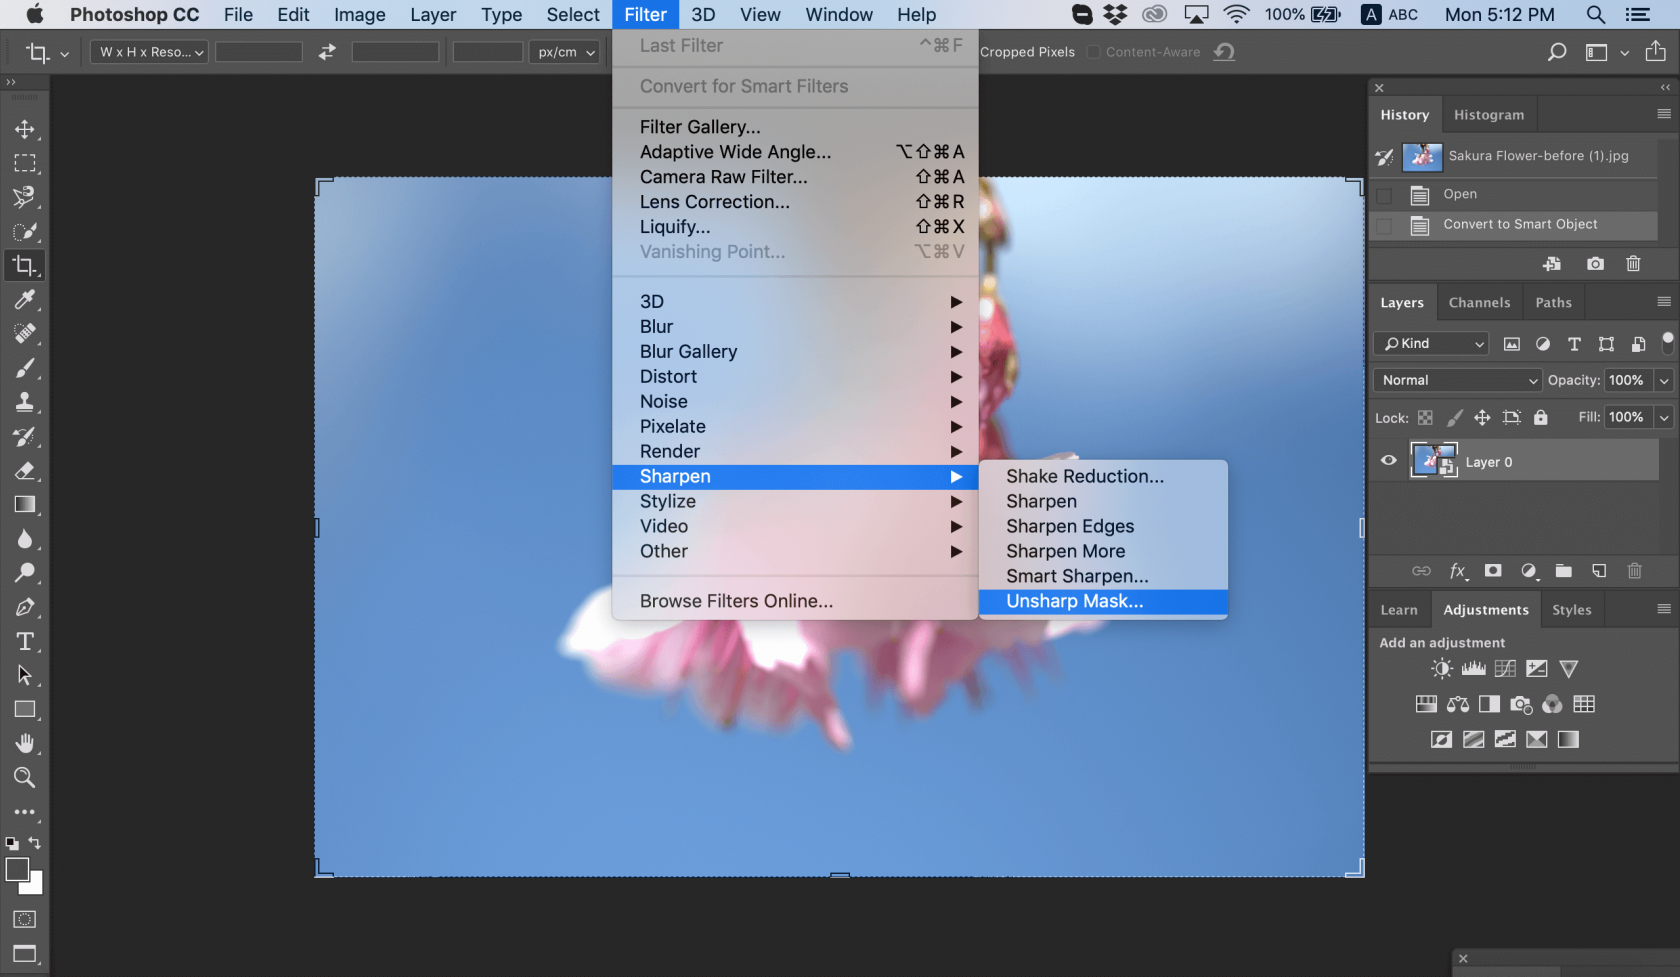
Photo by
Chris Willson
5. In the Unsharp Mask dialog box, drag the sliders to achieve the desired effect.
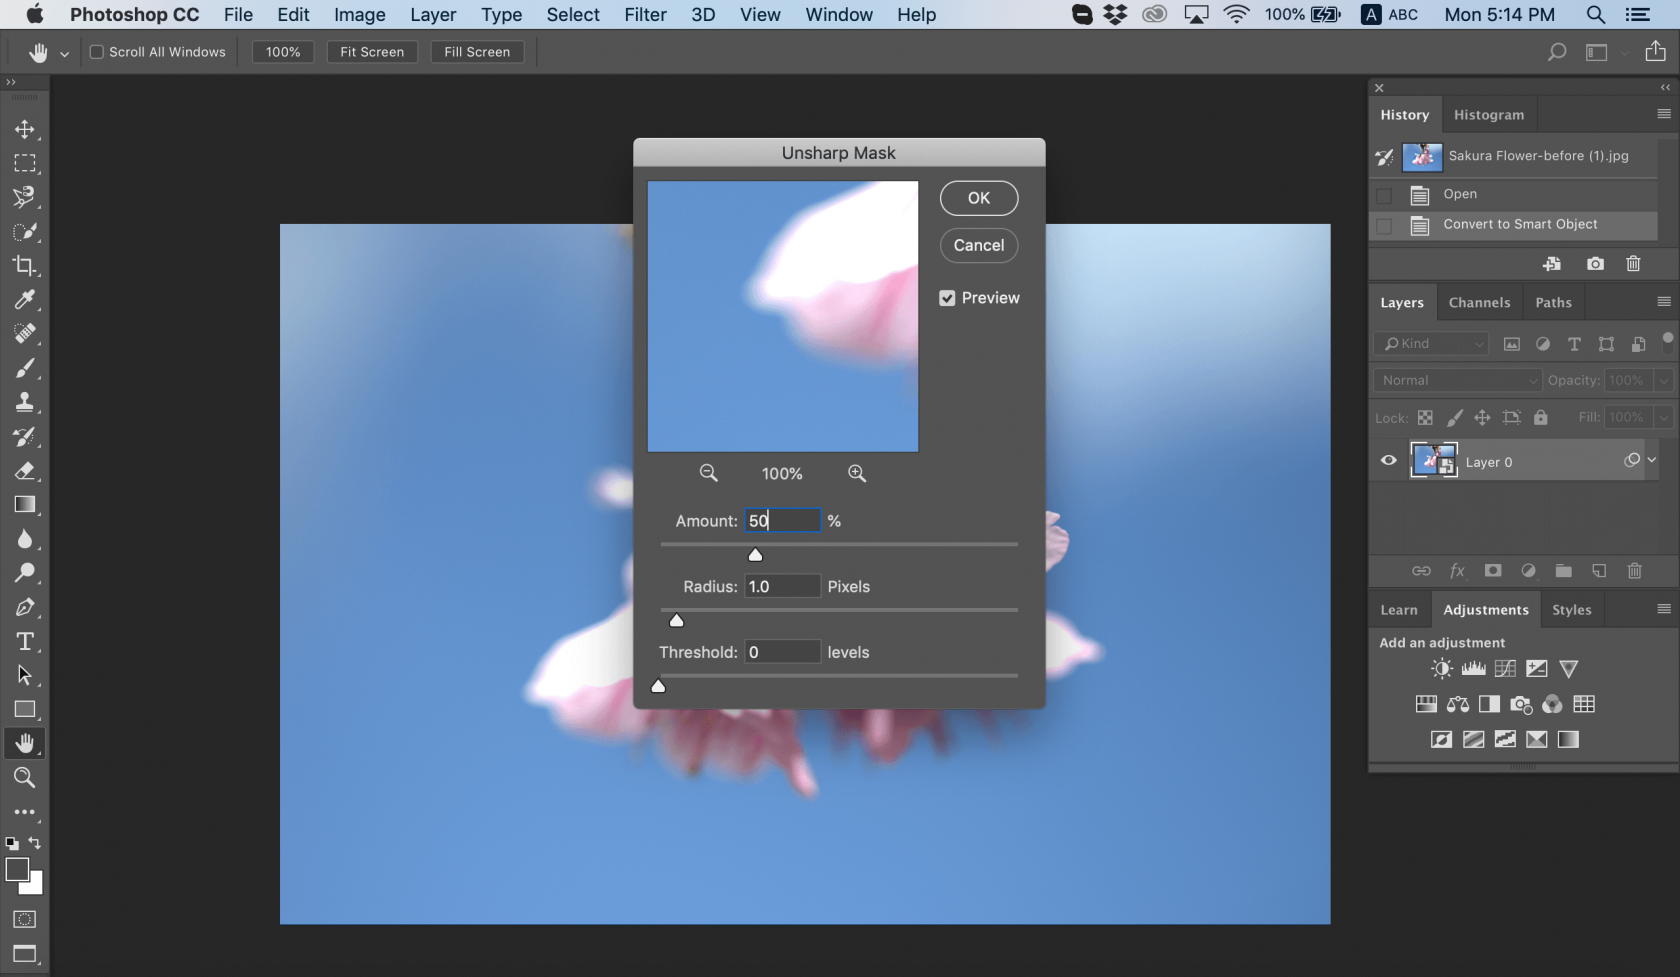
Photo by
Chris Willson
6. Save your photo.
This is the gist of how to sharpen an image in Photoshop. However, there are a lot of details that we could add. For example, you can double-click the Zoom tool in the Tools panel to zoom in to 100% so you can accurately judge sharpness.
If you need to change your sharpening, you can easily do so by double-clicking Unsharp Mask in the Layers panel to reopen the Unsharp Mask dialog box.
Unsharp Mask
As you can see, in the example above we’ve used the Unsharp Mask to sharpen an image. Unsharp Mask is an image sharpening filter that has sliders for amount, radius, and threshold.
- The Amount slider lets you set the strength of the sharpening effect. The more you slide it, the more sharpening you get.
- The Radius slider sets the width of the sharpening effect at the edges of objects. You can manage the sharpness of the pixels on the edges of your photo with this control.
- The Threshold slider helps you control the general sharpness of an image’s area. Use it to minimize sharpening of elements you don’t want to emphasize, like grain in the sky. By sliding it to the right, you can minimize sharpness of oversharpened pixels.
Experiment with these sliders to see which works best for you to sharpen blurry images. Be aware that the effect will vary based on the size of your image, since Unsharp Mask focuses on pixels.
Smart Sharpen
Are there any other ways to unblur an image? You can use the Smart Sharpen filter to sharpen blurry images and add control sharpness. Basic and advanced settings include controls that let you play with different amounts of sharpness, shadow, highlights, and more. How is Smart Sharpen different from Unsharp Mask? Smart Sharpen is recommended for targeted sharpening because it minimizes noise in low-contrast areas. On the other hand, the Unsharp Mask filter is good for output sharpening.
Here’s how to apply Smart Sharpen:
1. Open your photo.
2. In the Layers panel, click an image layer or the Background, then press Ctrl-J (Windows) or Cmd-J (Mac) to duplicate it. Right-click the duplicate layer and choose Convert to Smart Object.
3. Choose Filter > Sharpen > Smart Sharpen. This will open a dialog box.
4. From the Preset menu, choose Default.
5. Lower the Reduce Noise slider to view the full sharpening effect.
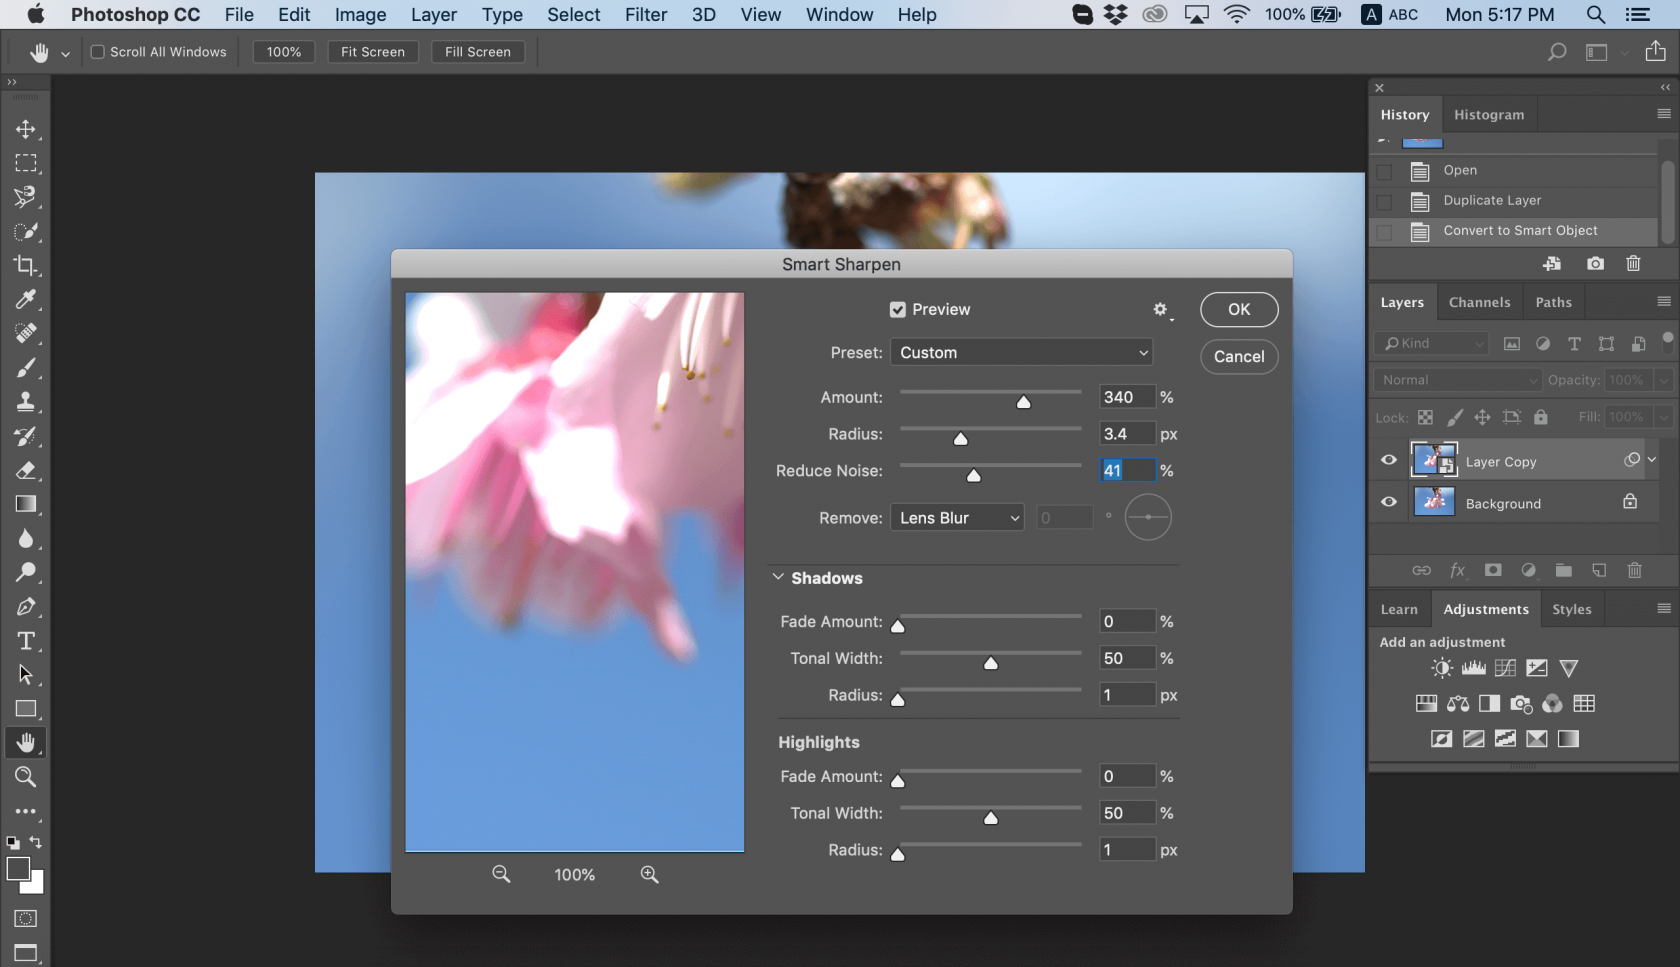
Photo by
Chris Willson
6. Choose an Amount value for the strength of the sharpening. Increase the Radius value until you see halo effects along sharp edges, then reduce it just enough to remove the halos. The image may look too sharp now, but don’t worry; you can adjust it by tweaking the Radius, Fade Amount, and Tonal Width values in the Highlights.
7. To compare the unsharpened and sharpened versions of the image, press the Preview button in the dialog box. You can still change the details and sharpen your blurry image to your liking. Save your image when you’re done.
Another perk of using the Smart Sharpen filter is the ability to save settings and use them with other photos in the future.
High Pass filter
Another way to sharpen an image in Photoshop is to apply the High Pass filter. This is a great image sharpener if you don’t want to experiment with different sliders, since it has only one very effective setting.
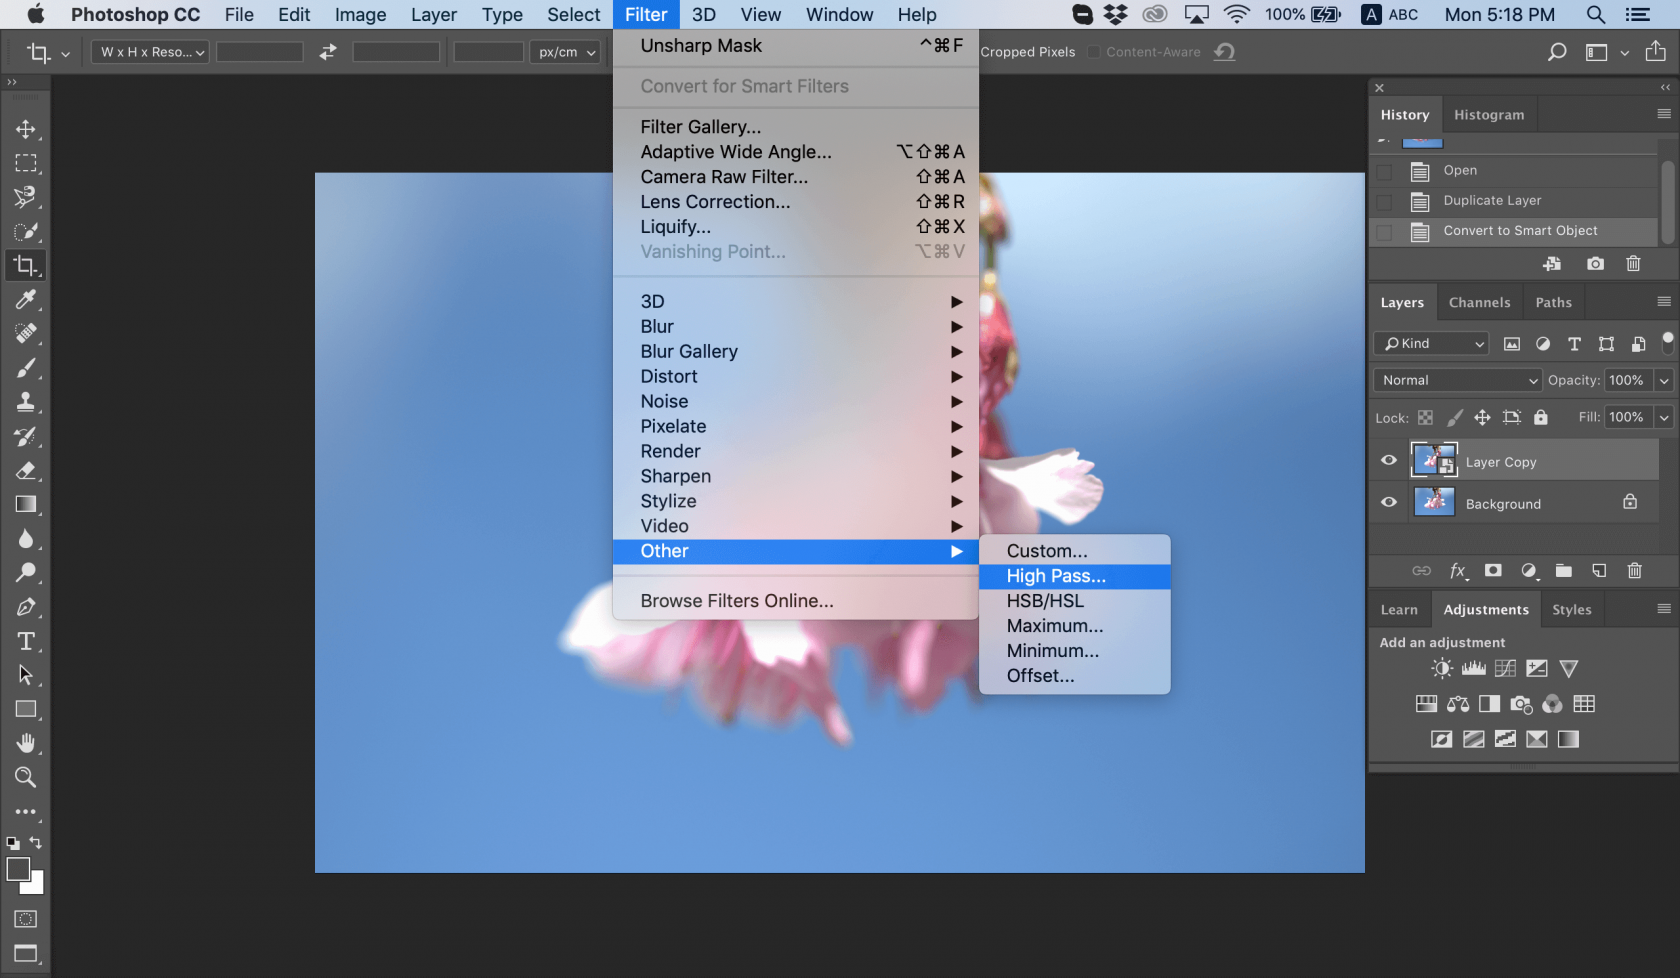
1. Set the Radius Scale to the minimum and click OK. This setting will let you add grayscale to your image.

Photo by
Chris Willson
2. Change the blending mode for your photo.
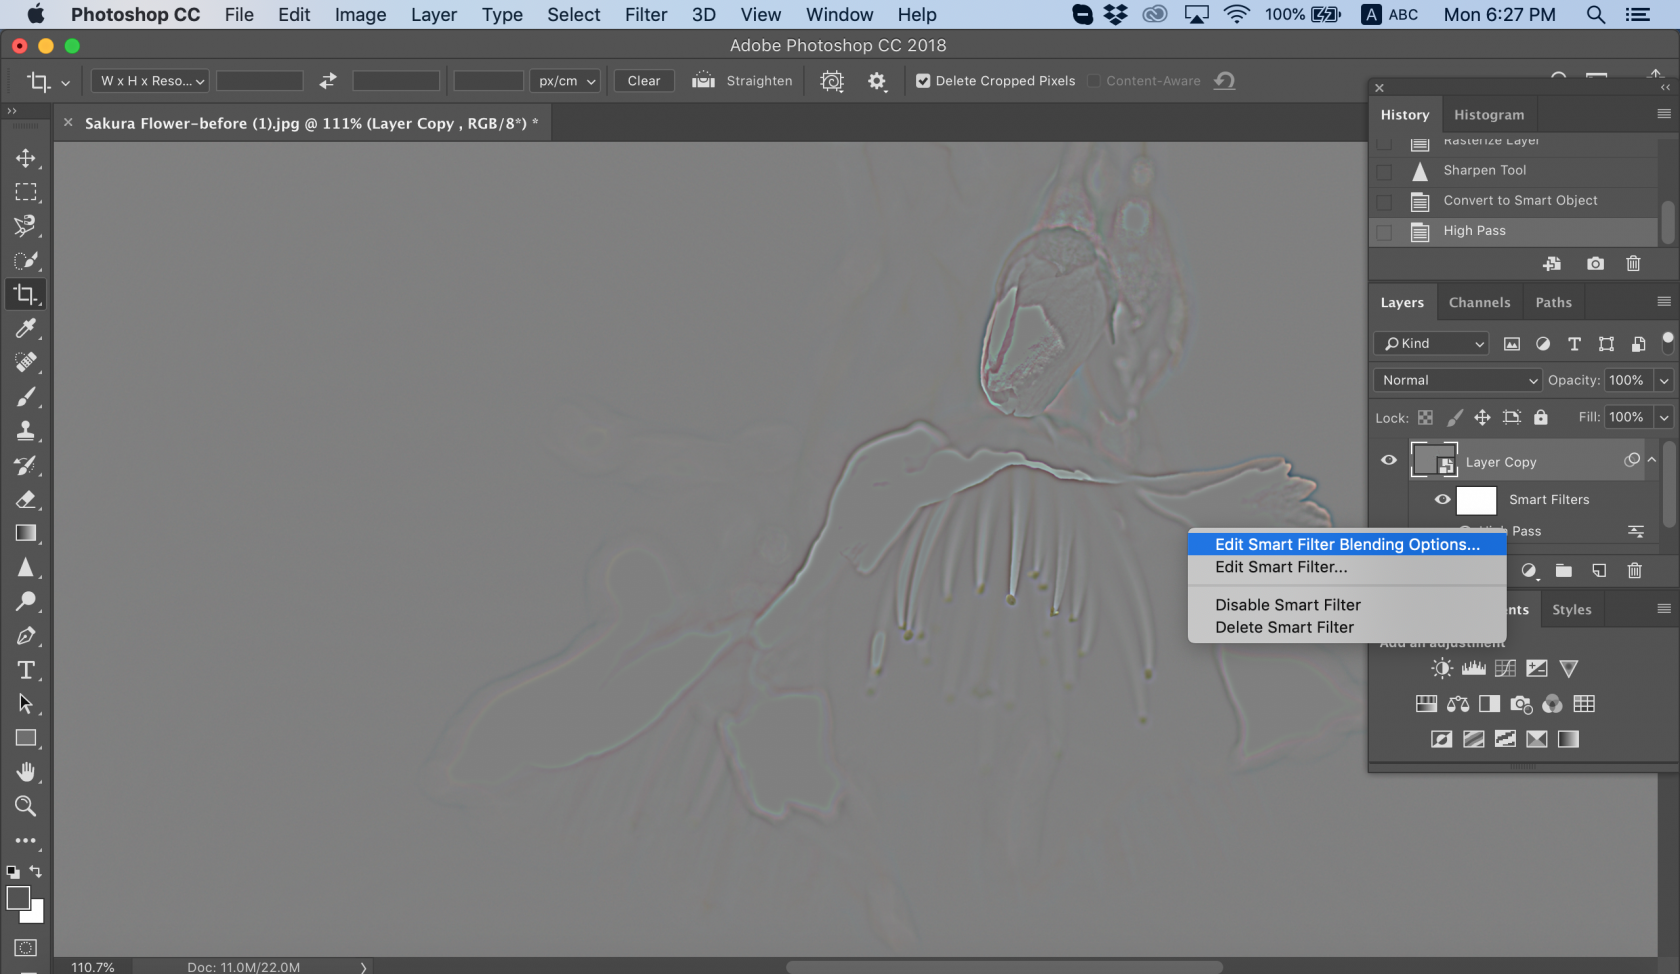
Photo by
Chris Willson
Use anything you want: overlay, soft light, hard light, or linear light. While changing the blend mode, you can see the sharpness of your photo and the areas you need to work on.
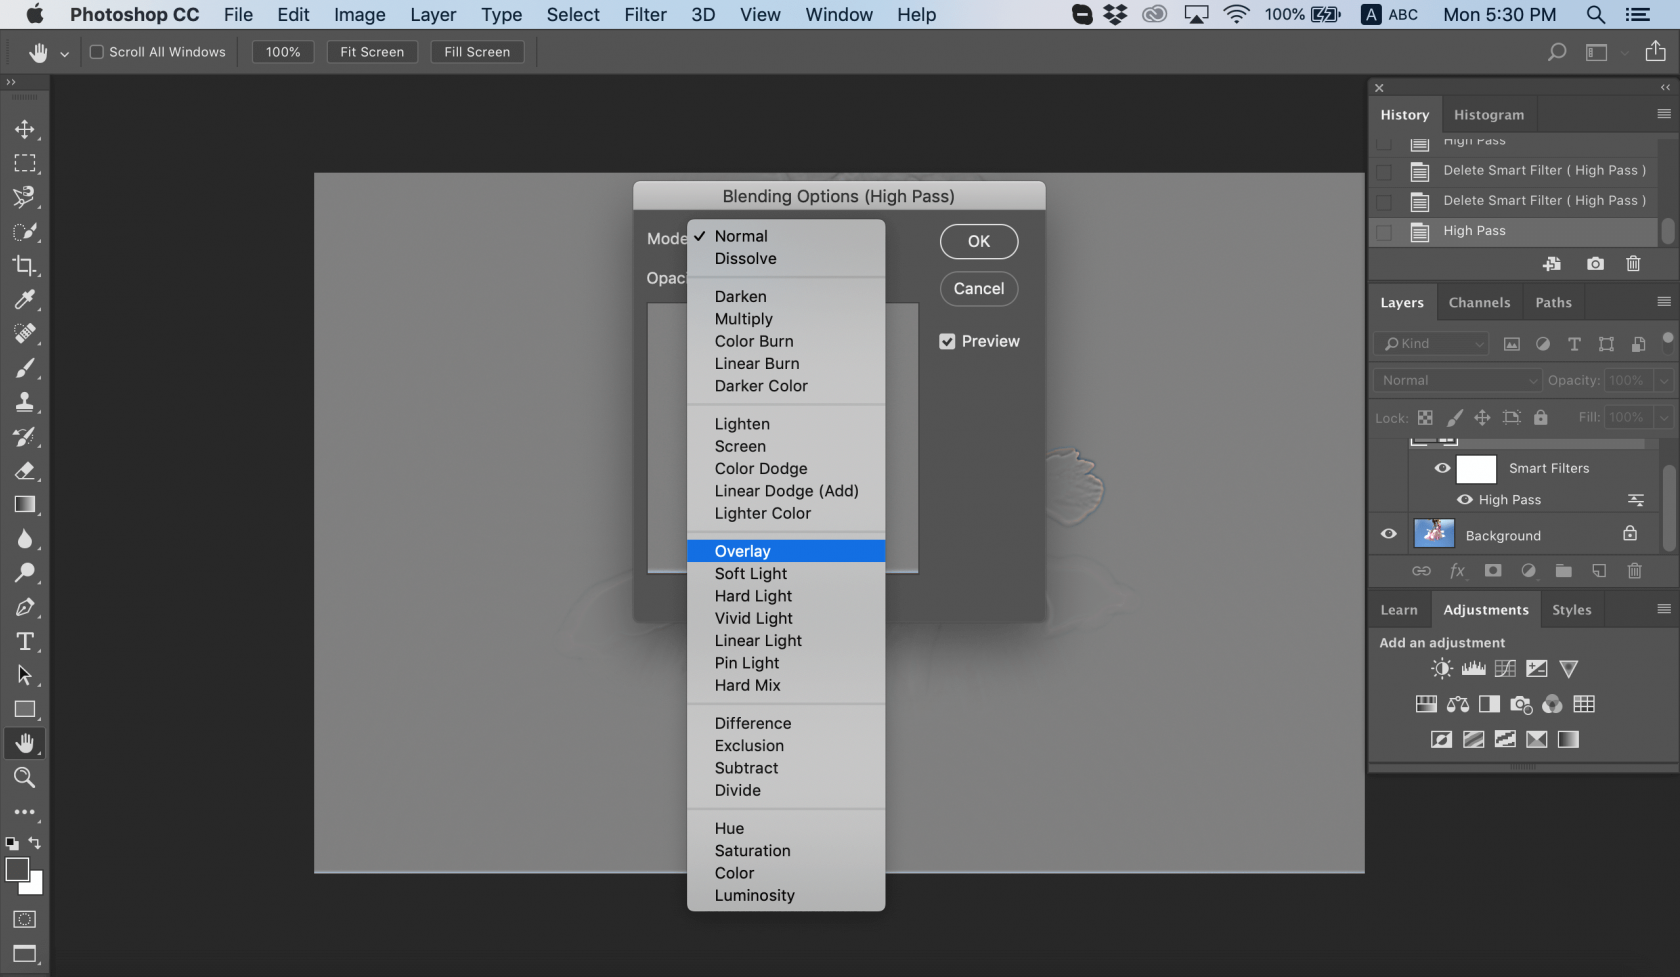
Photo by
Chris Willson
3. Click OK.
4. Save your project or export your photo for further use.
If you’re not satisfied with the results, you can change the radius and blending mode to find a perfect balance of sharpness. Here’s how to blur a picture if you need the opposite workflow.
Shake Reduction filter
Sometimes you need to make an image sharper because camera motion produced shakiness. Photoshop has a great tool specifically designed to reduce image blurring caused by accidental camera shaking. This tool is called the Shake Reduction filter, and it can be found in the Filter > Sharpen menu. Its main function is to minimize blurring that results from several types of camera motion, including linear, arc-shaped, rotational, and even zigzag. Here’s how to use this filter to unblur your image:
1. Open the image in Photoshop.
2. Select Filter > Sharpen > Shake Reduction. Photoshop will automatically analyze the region of the image best suited for shake reduction, determine the nature of the blur, and extrapolate the appropriate corrections to the entire image.

Photo by
Chris Willson
3. The corrected image will be displayed in the Shake Reduction dialog. You can apply other adjustments to it now.
4. Save your work if you’re satisfied with it.
If you don’t see any difference, click the Preview option to see the image before and after applying the filter. Or use any other photo sharpener tool to get the job done.
Sharpen image areas
The last tool we’ll touch on today is Sharpen. Its main function is to increase contrast along the edges in your photo. This, in turn, increases the apparent sharpness. The more you use this tool over an area of your photo, the more sharpening you get. Tip: If the Sharpen tool isn’t visible, click and hold on the Blur tool.
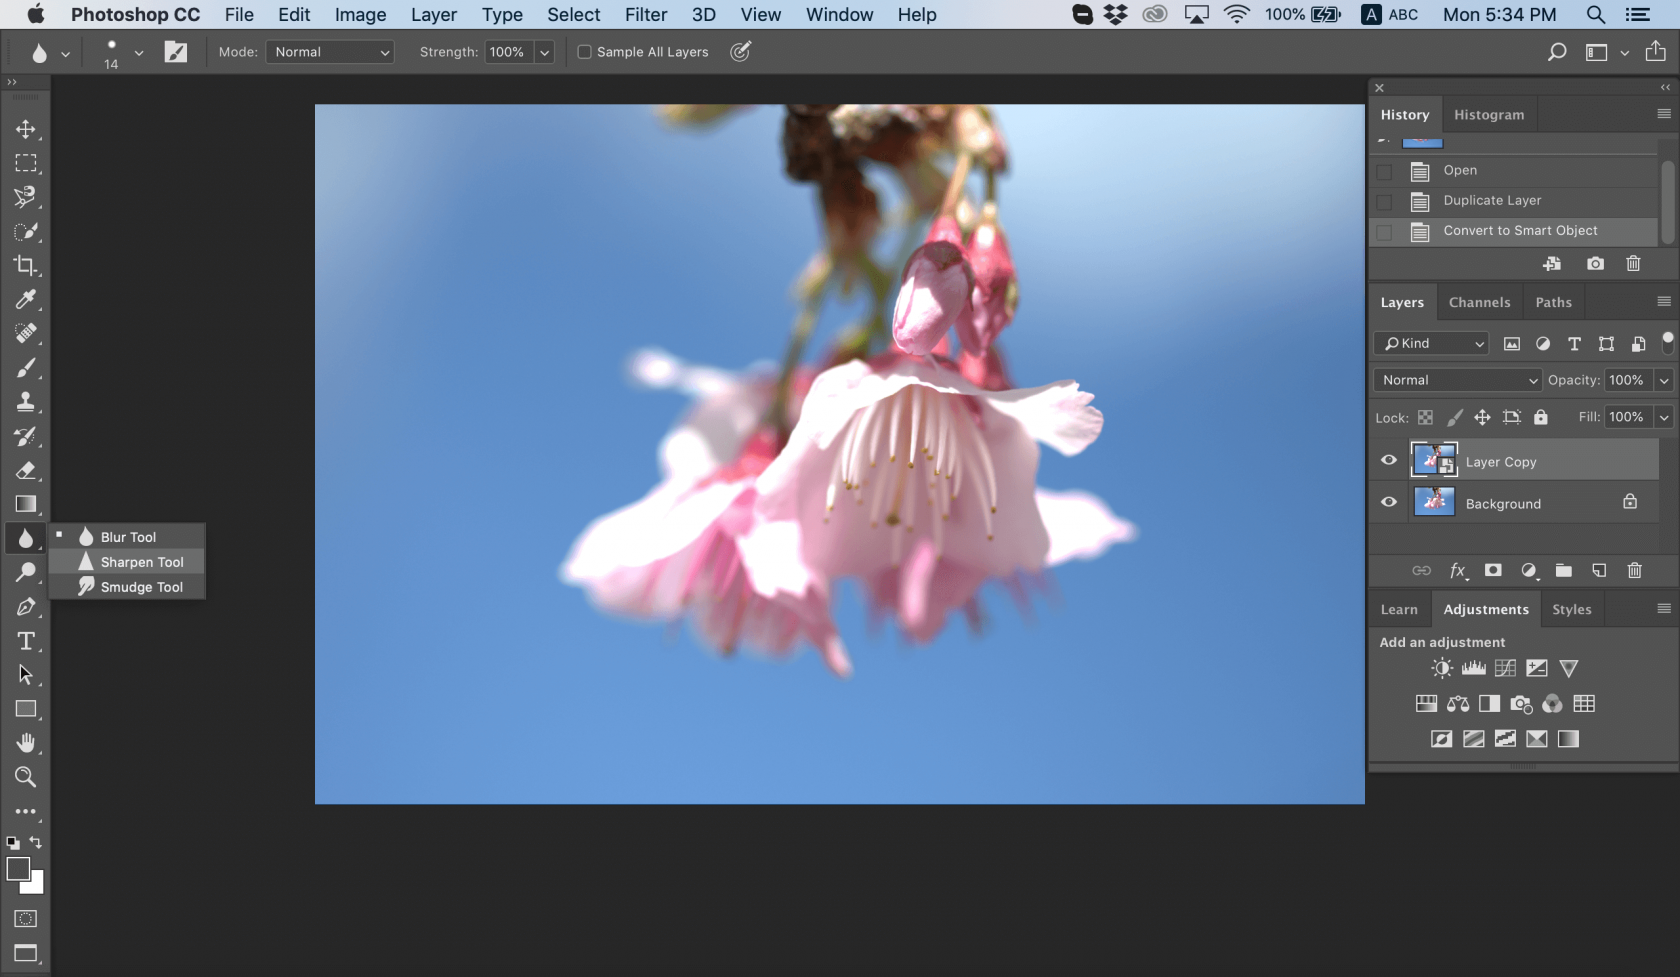
Photo by
Chris Willson
1. Open your image in Photoshop.
2. Choose a brush tip and set options for the blending mode and strength.
3. Select Sample All Layers to sharpen using data from all visible layers. If this is deselected, the Sharpen tool uses data from only the active layer.
4. Select Protect Detail to enhance details and minimize pixelated artifacts. You may deselect this if you want a more dramatic sharpening effect.
5. Drag over the part of the image you want to sharpen and unblur your image.
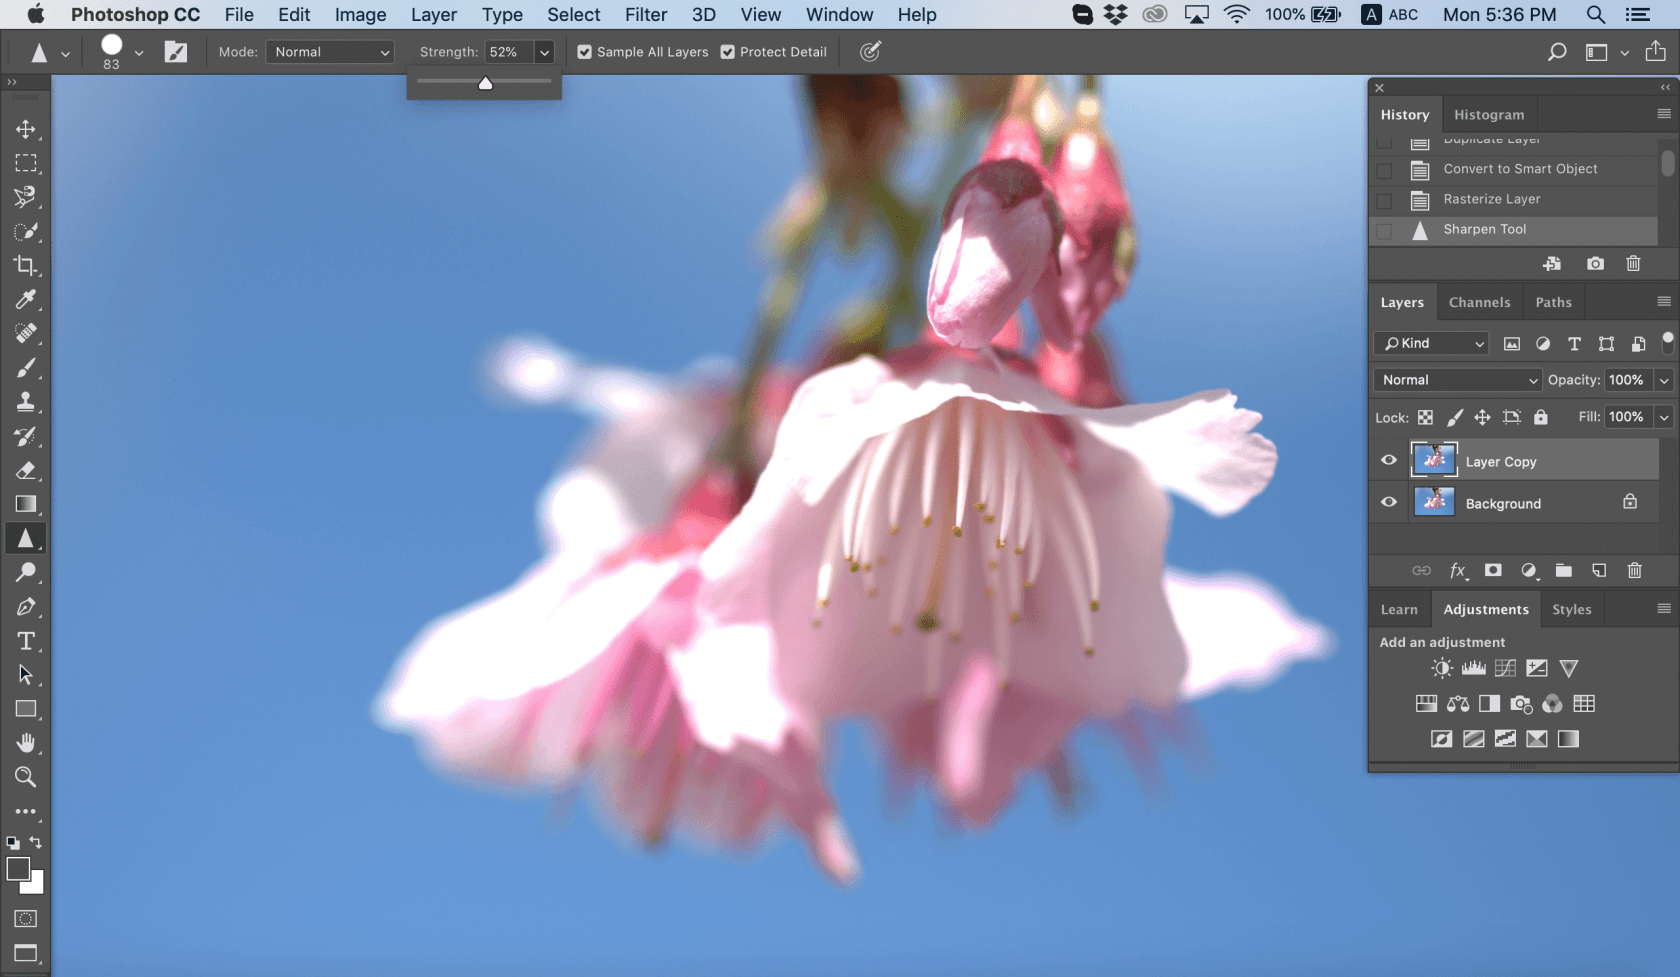
Photo by
Chris Willson
This is a great tool if you want to get the job done quickly and easily. If your image is too blurry, you can also look at this article to find out how to make a blurry picture clear.
How to sharpen an image in Luminar
Luminar is a great piece of software if you want to sharpen images but don’t want to spend too much time familiarizing yourself with the tools. Luminar’s interface is sleek and simple, perfect for beginners who are just getting into editing but also for experienced photographers who want to get the most out of an editing program. Let’s analyze an alternative way to sharpen images without using Photoshop.
The Sharpening filter
You can achieve a quick and easy sharpening effect with the Sharpening filter in Luminar. When you select it, you’ll see different sliders that control the result. Let’s go over them one by one:
- Amount – Determines the degree of overall sharpening.
- Radius – Determines the size of the area around each point you wish to sharpen. A smaller radius affects smaller details. Note that this adjustment works hand in hand with the amount slider, and adjusting one will substantially impact the other. Setting either slider to a high level can lead to significant color and contrast distortion. So if you want your photo to look natural, don’t overdo it.
- Masking (threshold) – Gives you control over which areas are adjusted. For example, you can choose to selectively increase the contrast in areas that already have high contrast (i.e. eyes or foliage) while not adding too much contrast to areas you’d like to leave smooth (i.e. skin or sky). On the other hand, if you want to adjust everything evenly, leave the masking slider at 0.
Sharpen your photos in Luminar
Want to know how to unblur a picture? Here’ are clear instructions on how to use this image sharpener tool in Luminar:
1. Select your image in Luminar.
2. Add the Sharpening filter to your workspace by clicking Add Filters, then selecting Sharpening under the Issue Fixers category.
3. Tweak the Amount, Radius, Masking, and Dehalo sliders to get the best effect.

Photo by Evgeny Tchebotarev
4. When you’re satisfied with the result, simply click Apply and Luminar will save your work.
There’s nothing easier, right?
Custom Looks
The best about editing in Luminar is that you can save your sharpening settings in a custom Look. After you’ve made changes to your image, simply click on Filters > Save Luminar Look. The next time you open your Custom Looks in the Looks panel, your effects will already be there.

Photo by Evgeny Tchebotarev
Sync settings
If you don’t want to save a whole new Look but like the effect of your photo and want to give the same effect to other photos in your library, you can simply copy and paste the settings to other photos without having to repeat the same workflow. What a time-saver!
Luminar is a great tool if you want to learn how to unblur a picture quickly and easily. It has smart sliders, great filters, and can help you achieve the best results quickly. If you’re looking for an alternative to Photoshop’s complicated tools, give Luminar a try and see if it suits your workflow. Just click the button below to try it for free.

![]()
Experience the power of Luminar Neo
Try free
Try free


