
Flow Charts
Mục lục
 What is a Flow Chart
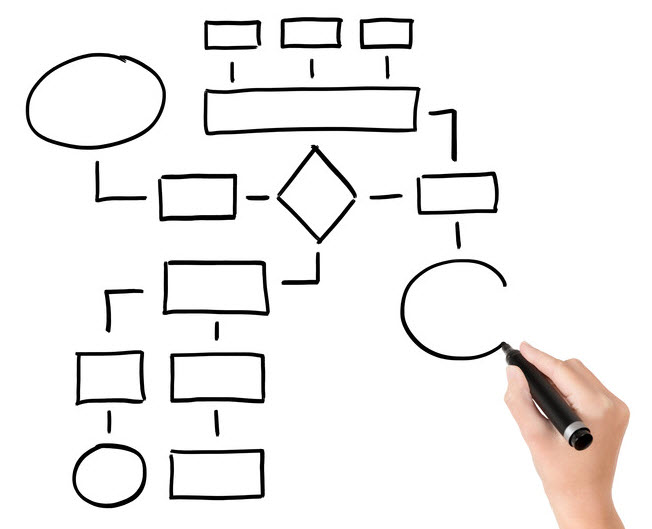
A Flow Chart is a visual representation of the different, usually sequential steps involved in a process, service or event.
The Flow Chart is 1 of the 7 QC tools and can be utilized for many different purposes.
One of the primary purposes of the Flow Chart is to provide a common reference point of complex processes to facilitate root cause analysis and discussion.
Another purpose of the Flow Chart is to outline an existing process and highlight any potential improvement opportunities as it relates to the structure or flow of the process.
9 Tips for Creating & Using Flow Charts
Whether you’re brand new to Flow Charts, or just looking for a few tips, I thought I’d include some tips that will improve your Flow Charts.
Tip #1 – Confirm that all the right people are involved
Nowadays, more than ever, teamwork is absolutely critical to your success. If you’re like me, you likely work on complex problems within complex processes or services and you would be doing yourself and your team a disservice by not including all the right people at all the right times.
An example of this would be, for those of you who work with a process of service that is performed by multiple shifts or crews, including leadership from both shifts or crews. By doing this you might reveal that the two shifts do things a bit differently which may cause or contributed a problem.
Tip #2- Start with the boundaries (Beginning & End)
I’m assuming that you work with very complex processes, and if you tried to flow chart the entire process, the exercise could go on forever, right?
Another tip for success is to set clear boundaries around your work by agreeing on the Beginning and Ending of your analysis. It will help you define your efforts and establish clear expectations.
Tip #3 – Be clear about your objective in creating the Flow Chart
Now that you’ve established the boundaries of your Flow Chart, it’s always good to spend some time considering what you’re trying to accomplish.
Doing this it will aid in determining the type of chart to utilize and the amount of information you will need to complete the Chart.
Tip #4 – Agree on the appropriate level of detail
Speaking of objectives, either before hand or as you’re creating your flow chart, it’s always good to discuss with your team the amount of information required to accomplish the task that you all agreed too. Below are a few different Data points that can be included in your Flow Chart:
- Inputs
- Outputs
- Wait Time or other Non-Value Added Time
- Process Time (Value added)
- Man Power (Resources)
- Equipment Up-Time or Scrap
- Work In Progress
- Documentation Associated with each process or step
- Financial Transactions
Again, be sure to base the details on your goals and objectives. For more ideas about possible information to include in your Flow Chart check out the image below of the Process Map (Value Stream Map).
Tip #5 – Break Complex Processes out into Sub-Processes
This is somewhat of an extension of the first tip as another way to properly set boundaries on your Flow Chart. By discussing with your team if a complex process or system should be broken out into it’s own Flow Chart may save you a ton of time!
Tip #6 – Don’t stress about symbols – there’s really no right or wrong way!
Do not waste a single moment of time stressing out about the types of symbols you’re using! Whatever you do though, you need to be consistent with your symbols.
I’ve included some information below on the 4 most common Flow Chart symbols for your reference. However if you do choose to use your own symbols, then I’d recommend creating a legend as this will help you stay consistent and communicate your symbology.
Tip #7 – Start your Flow Chart with Pen to Paper
Nothing ruins a good brainstorming session faster than some engineer (and I’ve been guilty of this as well) stopping their team so that they can get the formatting perfect on their fancy software program.
Create your flow chart by hand first to work out the kinks, then transfer it over to a computer. Many people recommend the yellow sticky method as it allows you to move things around quickly without having to erase and re-write things.
Tip #8 – Once you’re ready, try a computer software like X-mind or EDraw.
Once you’ve worked out all the bugs, take your yellow sticky Flow Chart and convert it to a nice, fancy looking diagram using a computer software so that you can retain and share your flow chart for future analysis.
I used X-Mind to create the CQE Top Down Flow Chart below and it comes pre-loaded with all different types of flow charts that will give you a clean looking Flow Chart.
Tip #9 – Validate your Flow Chart.
It’s very easy to create a Flow Chart for a process that doesn’t truly represent the ACTUAL flow of work. One way to avoid this error is to physically walk the process with the actors involved.
For processes that do not yet exist, this is a great opportunity to perform a dry run of the process that may help uncover flaws prior to rollout.
The 4 Most Common Types of Flow Charts
As I hinted at above, there are many different types of flowcharts that a Certified Quality Engineer can utilize & it’s important to understand these different types along with the benefits of each.
Below are the top 4 most common flow charts utilized by a CQE the Top Down Flow Chart, the Deployment Flow Chart, the Work Flow Diagram and the Process Map.
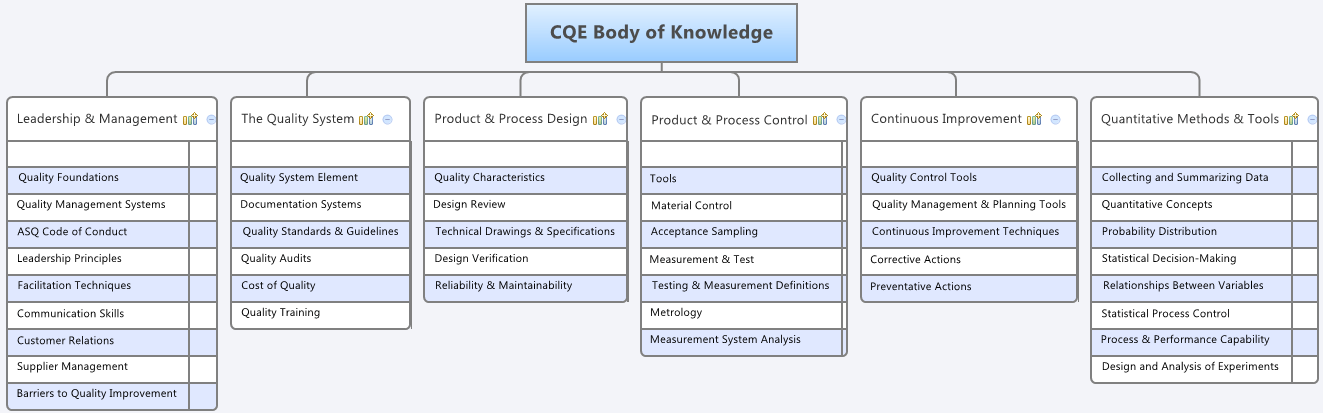
Top Down Flow Charts
This variation of the Flow Chart strongly emphasizes the major steps in your process with only a brief preview of the details. This is a good Flow Chart to use for large, complex processes that have many sub-processes underneath them.
Here’s an example of a top down flowchart I created for the CQE Body of Knowledge with all the major subtopics underneath each pillar.
Tip -With top down flow charts it’s good to limit yourself to 5 or 6 main topics as this will force you to consider only the really important steps or processes.
Deployment Flow Charts
This variation of the Flow Chart combines the major steps of your process with the interactions between the actors associated with each step.
The division within this type of flow chart can include people, organizations, locations, equipment, or different stages of a project or plan.
This type of chart is useful in exposing areas for improvement in the form of duplicate work or inefficiencies & unnecessary steps.
The downside of the deployment chart is that it forces every input into a “swim lane” and most often forces a larger layout for the flow chart.
The Work Flow Diagram
This variation of the Flow Chart is meant for situations where you wish to show the movement of tasks, actions, information or material from one group to another.
The Work Flow Diagram excels at identifying critical stages and key connections within the process and is an excellent tool to use when you need to communicate a process and identify inefficiencies.
Process (Value Stream) Maps
This Flow Chart Type should be used when you need a very detailed look at an entire process that can include things like inputs, outputs, procedure, waste, tasks, wait time, decision points or scrap.
This is the best way to perform a “deep dive” into your process to truly understand all the in’s & out’s of your process.
The Value Stream Map is the type of map I would recommend you use when trying to identify a process improvement project. By creating this value stream map, you will be able to see how all the pieces of your process work together.
By taking a high level approach to process improvement, you’ll be able to better ensure that a process improvement in one area doesn’t negatively impact any other areas of your business, which may potentially lead to a net loss for your entire system.
Additionally, by collecting all the important metrics from your entire process, you’ll be able to better identify waste and eliminate it.
6 Questions you can ask to Reveal Waste & Improve your Process
So let’s say that you’ve set out to improve your process and you’d like to use a Flow Chart as a tool to assist you in that improvement (which I think is a great idea), below are 6 Question to ask in order to identify and eliminate waste from your process.
Question 1: Are Any Steps in Your Process Redundant?
Redundancy in a process is a huge form of WASTE. Identifying these redundancy is the first step in eliminating waste from your process.
Question 2: Are all of your Decision Symbols necessary and effective?
Decision, especially key decisions in a process require effort and can often be described as hurdles. You’re goal as a Quality Engineer should be to reduce or eliminate as many unnecessary hurdles as possible.
Perhaps the decision is causing a delay in the process contributing to WIP. Perhaps the decision is wasting the valuable time of a supervisor or perhaps that same decision would be better made later or earlier in the process.
Question 3: Where is the re-work in your process?
Re-work is waste, plain and simple. If you can identify where in your process the waste is occurring you at least have the opportunity to minimize or eliminate it.
Question 4: How many steps in your process are Valued Added or Required?
You may be noticing a theme at this point. . . . All I’m trying to do is to help you identify WASTE in your process. If a step adds no value and is not required (by laws or regulation, etc), then you should try to remove it from the process.
Question 5: Can you Identify steps where error could be prevented?
Every process has scrap. As you walk through your flow chart, think about steps that generate the most scrap. Then attempt to eliminate that scrap by preventing errors.
Question 6:Does Your Flow Chart reveal the Wait Time in your Process?
Another form a Waste is Waiting. Hopefully as you map your process you’ll become familiar with the amount of time required for each step, and more importantly, the amount of time spent waiting between process steps. After identifying this Wait Time, you can attempt to drive this waste from your process.
Common Flowchart Symbols
 Like I said above, you shouldn’t stress out about the types of symbols you’re using when you create a flow chart, but none-the-less I wanted to provide you with some guidance regarding the common symbols used in flow charts.
- Rectangle Box – Normally considered a basic processing symbol used to depict an event that occurs within the process.
- Diamond Box – Normally used to represent a decision within the process with 2 common exiting flow lines for Yes or No.
- Flow Line – Normally used to show the process flow or direction of the flow chart.
- Rounded Box – Normally used as the start/stop for the flow diagram
YouTube Video
Here’s another video from Eugene O’Loughlin that is specific to the Flow Chart. It is a bit slow for my taste but Eugene does a good job hitting the high points associated with Flow Charts and throws in a few examples for good measure.
Practice Questions
Below are a few questions to challenge your knowledge of the Flow Chart and its uses as a QC Tool. Enjoy!
What’s the purpose of the Flow Chart?
To analyze a process over time for variation
To collect relevant data about a product or a process
To chart the different, usually sequential steps involved in a process, service or event.
A bar chart that lists all the major contributors to a problem from highest to lowest.
You need a high level flow chart that highlights your many different, complex sub-processes without providing to much detail.
What Flow Chart type should you use?
A Top Down Flow Chart
A Deployment Chart
A Work Flow Diagram
A Process Flow Map
You need a Flow Chart that highlights the different actors in your process along with the major steps associated with each actor.
Which Flow Chart Should you use?
A Top Down Flow Chart
A Deployment Flow Chart
A Work Flow Diagram
A Process Flow Map
You need a Flow Chart that highlights the movement of tasks, actions or material from one group to another, while also highlighting high level activities & critical stages.
Which Flow Chart Should you use:
A Top Down Flow Chart
A Deployment Chart
A Work Flow Diagram
A Process Flow Map
The Symbol below is normally used to represent what within a process:
A DECISION with a process
The FLOW of a process
The START of a process
The END of a process
You need a Flow Chart that shows a detailed look at your process that includes scrap, processing time, material flow, wait time, etc.
What Flow Chart should you use?
A Top Down Flow Chart
A Deployment Flow Chart
A Work Flow Diagram
A Process (Value Stream) Map
![]() Loading …
Loading …
Loading …
![]()


