
How To Resize A Layer In Photoshop – Brendan Williams Creative
One of the most constant actions Photoshop users will do on a daily basis is to take one or more layers and resize them manually or to an exact dimension. We live in a world run by social media, so knowing how to resize your pictures to the exact size you need them is critical to getting the likes and re-posts you need. Thankfully, it’s never been easier to resize a layer in Photoshop.
To resize a layer in Photoshop, click on the desired layer in the Layers Panel and activate the Move Tool (V). Now click and drag the transform box handles to scale your layer. You can also lock the aspect ratio of the layer while scaling by holding Shift.
Now, this is just the tip of the iceberg when it comes to scaling layers.
Today you will learn how to resize your layer while maintaining the aspect ratio for both older and newer versions of Photoshop. You will also learn how to resize your layer to the exact dimensions that you need in both pixels and inches. I will then show you how you can shrink your layer to the size of a penny and restore your image without any quality loss. All of this, plus you will learn how to link two or more layers together and resize all of them at once!
Mục lục
Video Tutorial
How To Resize A Layer Without Distorting
When you’re resizing a layer, the last thing you want to happen is to distort it. You don’t want your layer to go from normal-looking to completely squeezed together.


Thankfully, Photoshop makes it easy to resize your image without worrying about it looking distorted or squeezed together.
To start the resizing process, click on the layer you wish to resize. You will see a series of white boxes around the perimeter of the layer, known as handles.
To ensure that you can see these handles, double-check that “Show Transform Controls” is checked in the Options bar while you have the Move Tool selected.

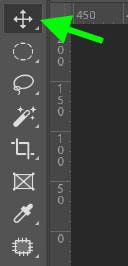


To resize the image without distorting it, click and hold on any of the handles and drag toward the direction you want to resize your image.
If this isn’t working as expected, make sure that the Link Icon in between the Width and Height boxes is checked.


If you drag your image from one of the corners, the layer will retain its aspect ratio toward the opposite corner.


If you drag from one of the middle handles, the aspect ratio will lock toward the opposite middle handle and shrink your image from the top and bottom.


Older Versions Of Photoshop
Old school users of Photoshop will remember having to press and hold the Shift Key to retain the aspect ratio when resizing a layer. In 2019 the process became more streamlined, eliminating the need to use the Shift Key to lock the aspect ratio.
If you own a 2018 or older version of Photoshop, you will need to hold down the Shift Key when resizing your layer to maintain your layer’s aspect ratio.
If you own the newer version of Photoshop and hold down the Shift Key while resizing your layer, you will break the aspect ratio of your layer, creating a more squeezed look.
To enable the aspect ratio lock while scaling in older versions of Photoshop, press the link icon in the Options Bar while the Move Tool is active. With this enabled, you do not need to hold Shift while scaling.

How To Resize A Layer To Specific Dimensions
Sometimes you will need to resize your layer to an exact dimension. Photoshop lets you do this efficiently, but first, you must be able to transform your layer freely.
Activate Free Transform


To put in the exact portions for our image, you’ll need to activate Free Transform on your image layer.
First, double-check that your layer is unlocked in the Layer’s panel. If the Lock icon is there, click it to unlock the layer.


To put your image into Free Transform mode, go to Edit > Free Transform. You can do this faster by pressing Control + T (Win) or Command + T (Mac).


Another fast way to put your image into Free Transform involves the Move Tool.
Select your image layer and click on the Move Tool (V).
On your image itself, take note of the handles surrounding the perimeter of your image.


Click on any handle, and you will be in Free Transform mode.
To make sure that this works, while you have the Move Tool selected, double-check that the Show Transform Controls box is checked on in the Options bar.
How To Resize A Layer To Exact Pixels
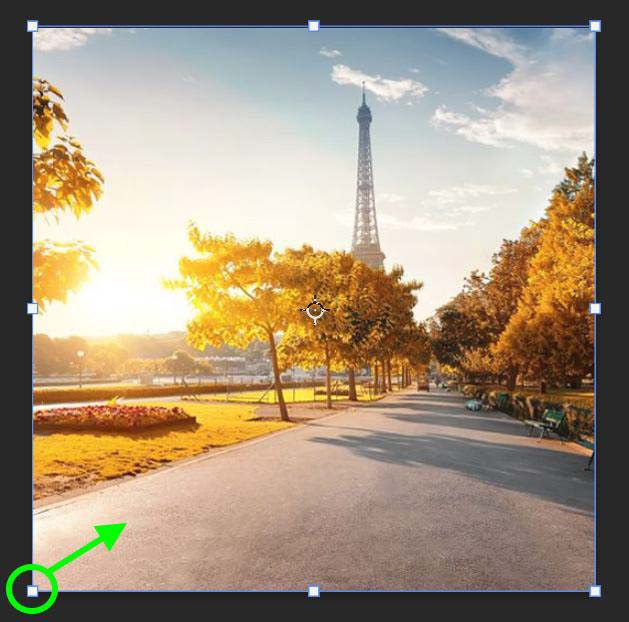
Now that your image is in Free Transform mode, you will see the option to change the Width and the Height of your layer.
![]()
![]()
Let’s say you want your layer to be 250 x 250 pixels. Simply double-click inside the Width and Height and type 250 px. Your layer will snap to that exact size.
![]()
![]()


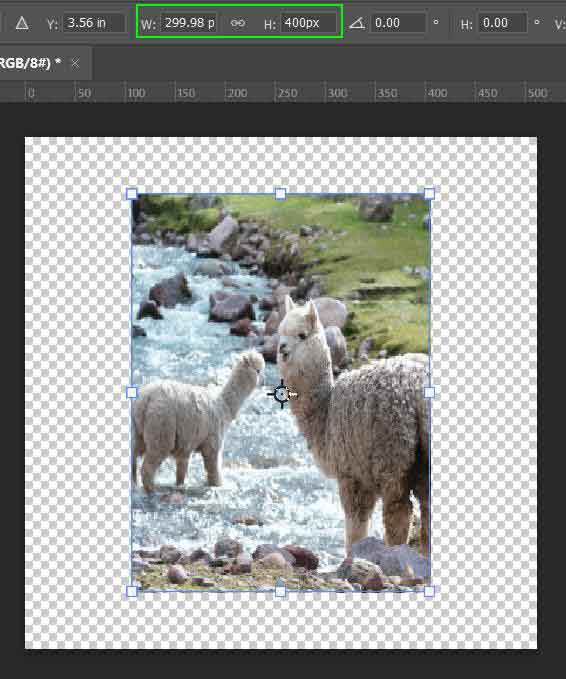
Let’s change this layer to 300 x 400 px. I’ll type in 300 px for the Width and 400 px for the Height.
Notice the Width below; Photoshop changed 300 to 299.98. Photoshop will automatically correct values when it sees fit to present the best-looking end result. This is perfectly normal.

If your desired size is the same amount of pixels for both the Width and Height, you can make things even easier by clicking the Link icon in between the Width and Height boxes (which is usually activated by default). Then, you just need to type in one value in one box, and the other box will change to that exact value.
So if I type in 100 for the Width, the Height will change to 100.


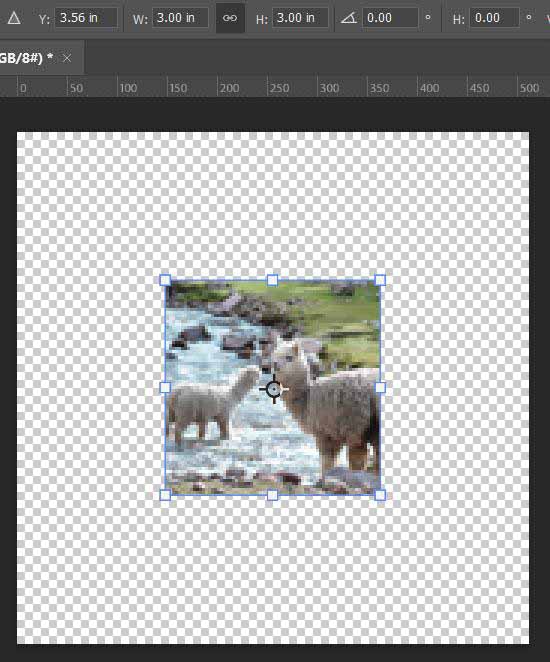
How To Resize A Layer To Exact Inches
To resize your layer to exact inches, instead of typing “px” for pixels, type “in” for inches.
So if I wanted to resize this layer to 3 in x 3 in, I would type 3 in for the Width and then type 3 in for the Height.

How To Resize A Layer Without Losing Quality In Photoshop
When you spend enough time resizing images, you’ll eventually run into the quality loss problem. Let me show you what I mean. Let’s shrink this layer by 75%.


Now I’ll expand it to its original size. Take a look at the image quality.


The image is now pixilated and blurry. This is because when you shrink down a standard layer, pixels will be altered and deleted destructively. That means those pixels are never coming back.
To fix this problem, you must first convert the layer you want to resize into a Smart Object.
In the Layers panel, click on the layer that needs to be resized and then right-click on it. A list of options will pop up. Click on Convert To Smart Object.


Another way to create a Smart Object is to select your layer in the Layers panel and then go to Layer > Smart Objects > Convert To Smart Object.


Resize The Smart Object
Now that the layer you want to resize is a Smart Object go ahead and shrink it.


Let’s bring it back to its original size and see what happens.
The Smart Object looks how it did before it was shrunken down, with no loss of quality when restored to its original size. Here’s a side-by-side comparison of the original layer to the Smart Object to prove it.


There’s no better way to ensure your image remains intact than to convert your layer into a Smart Object. A Smart Object is entirely non-destructive, so feel free to resize your Smart Object layers as many times as you want.
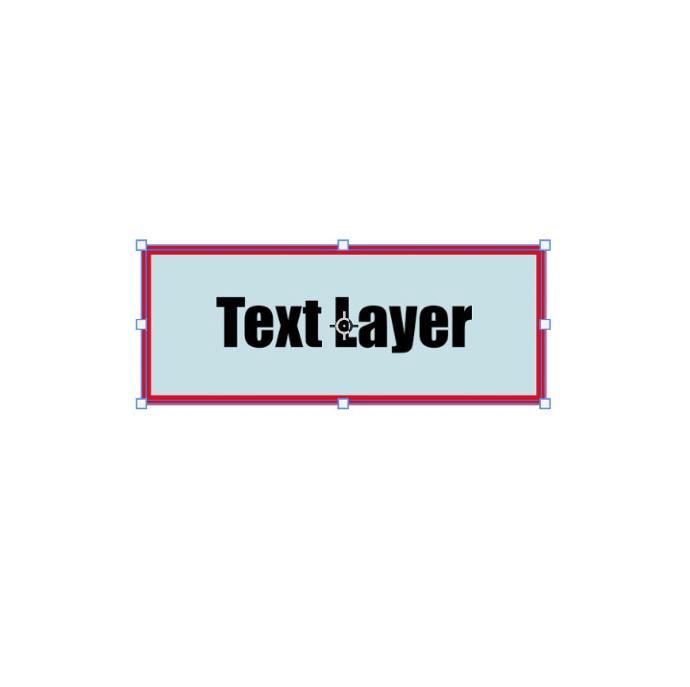
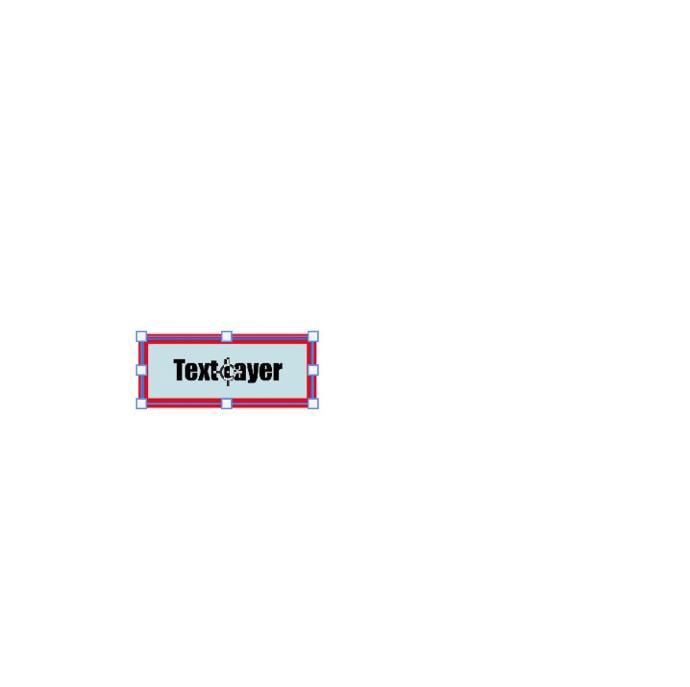
How To Resize Multiple Layers At The Same Time
If you wish to resize two or more layers simultaneously, you can do this by linking the two layers together before you resize them.
I’ll show you how to do this by linking a basic shape layer with a text layer and simultaneously resizing them.


In the Layers panel, you’ll find two separate layers. A text layer and a shape layer.

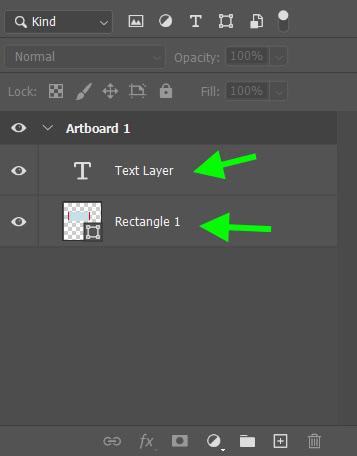
I’ll place the text layer over the shape layer.


In the Layers panel, I’ll select the top layer, hold down the Shift Key and select the bottom layer so that both layers are now selected.

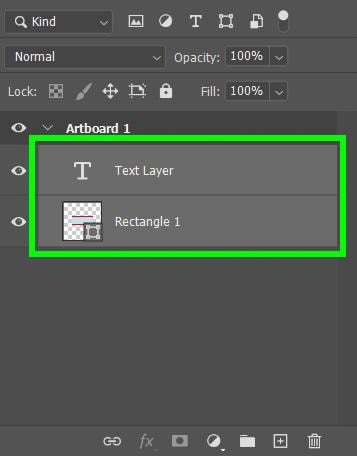
I’ll then click the Link icon at the bottom of the Layers panel. This will link the two layers so that if I alter one layer, the other layer will be altered.
You can see if two or more of your layers are linked by the Chainlink symbol next to the layers.


Now that my two layers are linked, I can shrink down the shape layer, and the text layer will shrink down proportionally with the shape layer.


Now that you know how to resize layers in Photoshop, the process is a little bit different when working with images. For example, scaling up a photo to prepare it for print or to fit on a larger document. I explain those techniques in this next tutorial on how to resize images in Photoshop without losing quality!


