
How to Increase the Resolution of an Image (5 Quick Ways)
Through this tutorial, understand how to Increase the Resolution of the Image. Get to know more about Recommended Image Resolutions for various projects:
A few times, I incorporated an exquisite image into my webpage, only to be disheartened by how small, grainy, and utterly unusable it looked. I am no expert in image editing, but someone told me I can increase image resolution. Once I learned how to increase the resolution of images, it became easier for me to create compatible designs in no time.
So, here in this article, let us see how to increase the resolution of an image easily. I will give you solutions to increase image resolution with and without Photoshop and how to increase the resolution of images online for free.
I will also help you understand exactly what this resolution is that everyone keeps referring to all the time and some terminology you will come across while trying to increase the resolution of the image.
There’s so much to tell you, so let’s get started.

What is ‘Resolution’ in an Image
[image source]
Have you seen how in movies, a detective or police ask someone to enlarge and enhance a blurry image until it gets clear enough to extract a piece of evidence? Well, it doesn’t work like that.
The resolution of an image is its details, which are found by focus precision, quality of the lens, and pixel count of the camera sensor. If you want to print the photo, you will also have to consider certain other factors like the size of the photo, print quality, and display medium.
The resolution of an image often also refers to the resolving power of the lens, PPI, or pixels per inch for printing and the comprehensive count of pixels of a digital image.
If you are a designer, concern yourself with the complete count of pixels of the digital picture. Increasing image resolution means you will have to turn an image of 200X200 pixels into a 1000X1000 pixel image. Now, if pixels are insufficient, in other words, high enough resolution, the picture will look grainy and of low quality.
Suggested Reading =>> Photo Viewer Software with features
Terminology
Here are a few terms you will come across often when you are trying to increase image resolution.
- Pixel Dimensions are the size or measurement of an image, both vertically and horizontally in pixels.
- Image resolution refers to the excellence of pixels in the given space, usually calculated in PPI or pixels per inch. The higher the PPI, the higher the resolution your image will have. In simple words, a higher PPI means a better quality image.
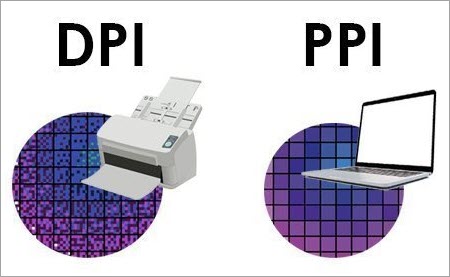
- DPI or Dots Per Inch is a term commonly used in image printing. It refers to the physical ink dots printed in one square inch of a printed photo.
- PPI or Pixel Per Inch is the term used for digital images for digital pixels in one square inch of a digital image.
DPI and PPI often create confusion. Cameras generate images in pixels while the printers convert these pixels into ink dots.
Screen resolution means pixel counts that appear on the whole computer screen and it varies with monitor size and display resolution settings.
The diagonal dimension of your screen is the screen size of your system, although the area you can use is typically lesser than that due to the bezel. If you display an image on a high-resolution screen at full size, it will look smaller as compared to the very same image on a low-resolution screen.
The resolution of a camera is the maximum any digital sensor can have and is often referred to as Megapixels. More megapixels mean increased light sensors on image sensors, resulting in better image definition and enhanced image.
Standard Image Resolution
[image source]
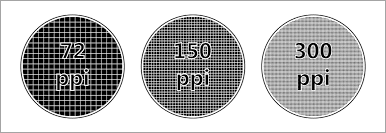
It is commonly believed that 72ppi is the common image resolution on the web. However, the density of pixels you go for online is trivial. PPI only matters when you are creating an image for printing.
On the screen, what matters is the height by the width of the image resolution. This means that an image of 200X200 pixels will look the same at 72ppi, as at 150ppi and 300ppi and an i 3000 x 2000 image of 72ppi will look better in print as compared to a 300 x 200 image of 72ppi.
Also, today nearly all computer and laptop screens come with more than 100ppi. So, your 17” monitor will be calibrated at 800 x 600 pixels and your 19” screen at 1024×768. These are the optimum screen settings, but you can change them if you want.
If you have a professional sophisticated printer, you will need 600ppi images. On the other hand, regular printers like Inkjet and Laser can print pictures at 200 to 300ppi and above.
Photographic images should be at a minimum of 300ppi while those for the larger format like posters can be approximately 150-300ppi, based on how closely people will see the posters.
Highest Possible Resolution for Images
The resolution of an image decides whether your design will look fuzzy or crystal clear. To enlarge or print an image, you will need denser image quality or the highest possible resolution. The low-resolution images look great at 100% but when zoomed in, they get pixelated or blurry.
The high-resolution images are at least 300ppi. That’s why they deliver good print quality and are necessary for any image you need as a hard copy. The resolution of an image also tells you how much you can enlarge an image and comes in handy for deciding what print size you can get out of that image at the best.
Rule of thumb: To get the maximum print size, divide the pixel size (dimension) by the resolution (at least 300ppi). For example, a 2000-pixel image at 300ppi can be printed up to (2000/300) inches, which comes to a little more than 6 inches.
Further Reading => Learn How to Fix Blurry Pictures within Minutes
Recommended Image Resolution for Various Projects
Before you learn how to make a picture higher resolution, you should know what is the recommended image resolution for the design project you are working on.
Posters
Posters are the most commonly used mode of advertisement. Here are the recommended sizes for the various posters:
#1) Small Posters

[image source]
Small posters are great for bulletin boards, school events, general announcements, etc. The recommended size for them is 11 × 17 inches and 3300 × 5100 pixels.
Pro Tip: Try to use fewer images and more bold letters to get your message across clearly.
#2) Medium Posters
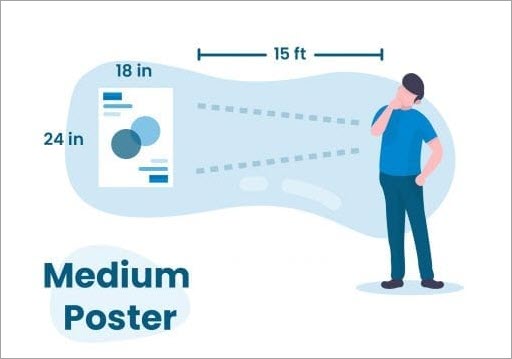
[image source]
These are perfect for outdoor advertising. Their size allows you to include more details and images. The recommended size for them is 18 × 24 inches and 2400 × 7200 pixels.
#3) Large Posters
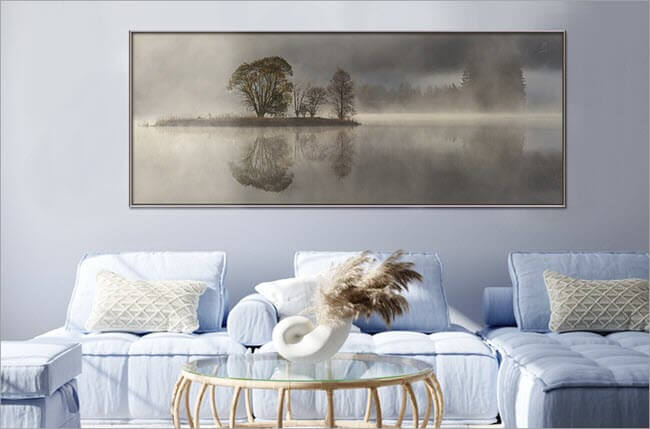
[image source]
These are the posters you see for movies, trade shows, decorations, etc. The recommended size for these posters is 24 × 36 inches and 7200 × 10800 pixels.
Flyers
Flyers are yet another extremely effective mode of advertising and getting your message across. Here are the recommended sizes for the various flyers:
#1) Small Flyers

[image source]
These are generally used for information about discounts and offers at stores. The recommended size for them is 4.25 × 5.5 inches and 1275 × 1650 pixels.
#2) Half Sheet Flyers
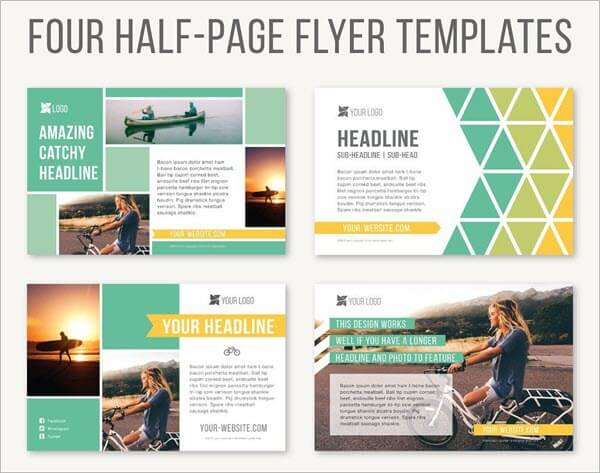
[image source]
Half sheet flyers are half the size of a letter sheet and are great for promoting events or offering little information. The recommended size for half-sheet flyers is 5.5 × 8.5 inches and 1650 × 2550 pixels.
Pro Tip: Prioritize essential information, use a combination of fonts and carefully choose your graphics or images.
#3) Letter Flyers
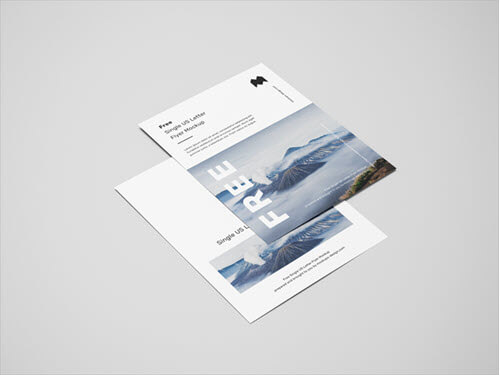
[image source]
The advantage of using letter flyers is that you can include a lot of information without crowding the look. You can use them for menu options, merchandise information, event information, etc. The recommended size for letter flyers is 8.5 × 11 inches and 2550 × 3300 pixels.
Brochures
Brochures allow you to include a lot of information and images neatly and effectively. Here are the common sizes for various brochures:
#1) Letter Brochure
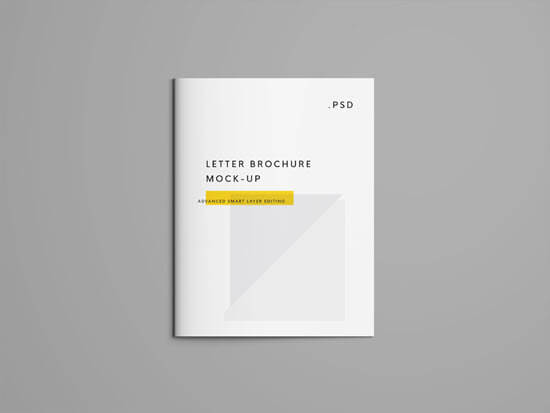
[image source]
This is the most used brochure style by home printers since it offers a lot of space for vital information and relevant images. The recommended size for this is 8.5 × 11 inches and 2550 × 3300 pixels.
#2) Legal Brochure
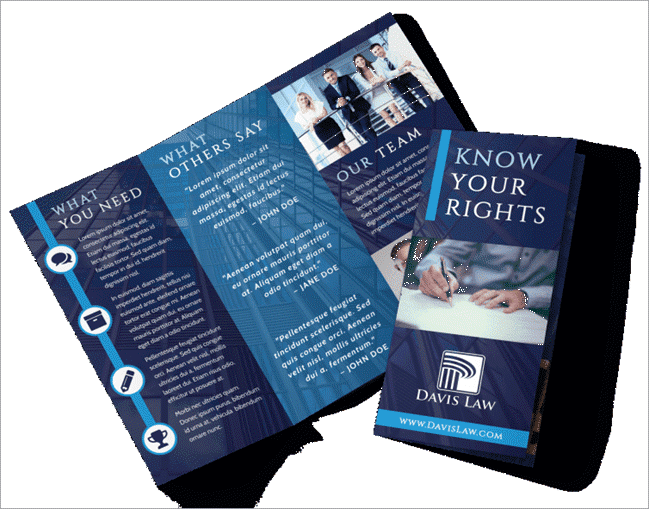
[image source]
These are the tri-fold brochures you often see for details on products and services. You can pack it with information and beautiful pictures related to the content. The recommended size for a legal brochure is 8.5 × 14 inches and 2550 × 4200 pixels.
#3) Tabloid Brochure
[image source]
Tabloid brochures are perfect for printing restaurant menus or programs for plays and concerts. The recommended size for this is 11 × 17 inches and 3300 × 5100 pixels. Pro tip: use full-size pictures and avoid using a big chunk of text.
How to Improve the Resolution of a Photo
Here are a few effective ways to increase the resolution of the image.
#1) Adobe Photoshop
By Altering Image Dimensions
Here’s how to increase photo resolution with Photoshop step-by-step:
- Launch Adobe Photoshop and open the image you want to change the resolution of.
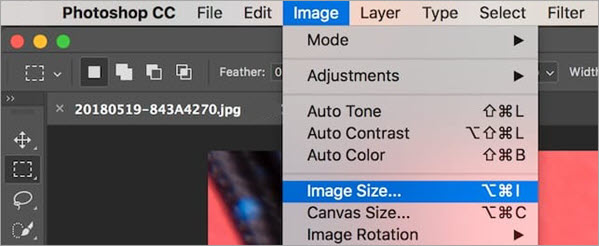
- Click on the Image in the header of the app.
- Select Image Size.
- This will open a new window.
- Go to Dimensions and select Pixels from the drop-down menu.
- Scroll down to find Width, Height, and Resolution options.
- Type the pixels you want in either Width or Height boxes.

Engaging the chain lock button to the left side of the width and height boxes will constrain the aspect ratio. So, if you change the number in a box, the numbers in other boxes will be adjusted accordingly to keep the aspect ratio the same as the original image. You can alter the resolution box to fix it.
By Using Neural Filters
- Launch Adobe Photoshop and open the image you want to edit.
- Go to Filters.
- Select Neural Filters.
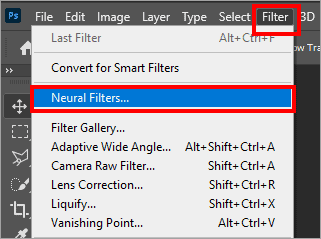
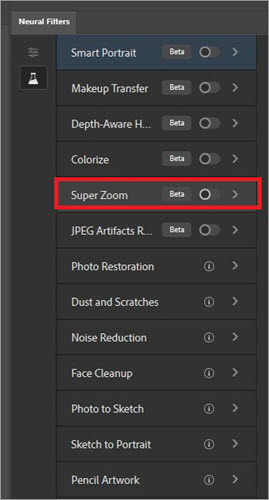
- Click on Super Zoom.
- Use the slider to adjust the image to your liking.
- Click OK.
#2) GIMP
GIMP is an open-source image editing tool for Windows, macOS, and Linux. Here’s how to make an image with higher resolution using GIMP:
- Download GIMP and install it.
- Open GIMP.
- Click on Files.
- Select Open.
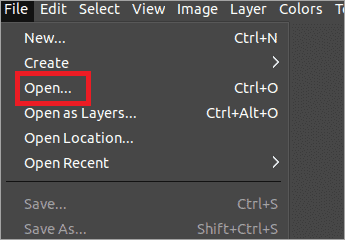
- Select the image you want to edit and click Open.
- Press CTRL+A for Windows or Command+A Mac.
- Press CTRL+C for Windows and Command+C for mac to copy the image.
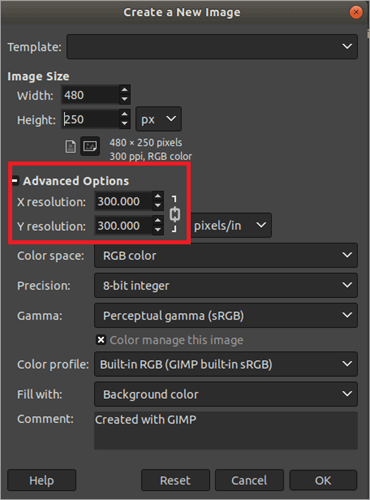
- Now, click on File.
- Select New.
- Go to Advanced Options.
- Adjust the X and Y values to 300 if they are not already set at that value.
- Click OK.
- Select Windows for a new image.
- Go to Image.
- Select Canvas Size.

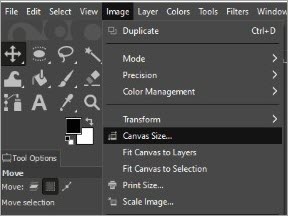
- In the dialogue box, adjust the canvas size after making sure the chain icon is locked.
- Enter the image width and press the Tab button to automatically adjust the height.
- Select Resize.
- Press CTRL+V or Command+V to paste the image.
- Drag the corners of the image window or zoom out if necessary to view all corners of the resized canvas.
- Go to the Resize Layers dialogue.
- Select Floating Selection (Pasted Layer).

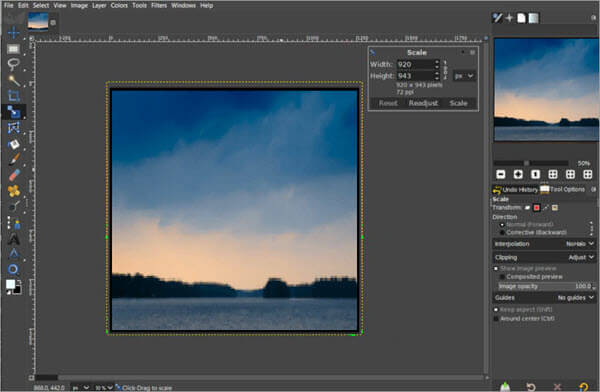
- Go to Toolbox dialogue.
- Select the Scale option.
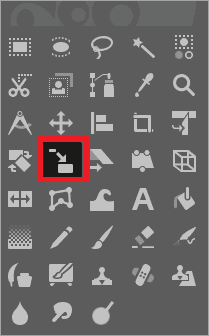
- Select the pasted image.
- Now in the scale dialogue box and enter the same width as above after making sure the chain icon is locked.
- If the image looks good, select Scale.
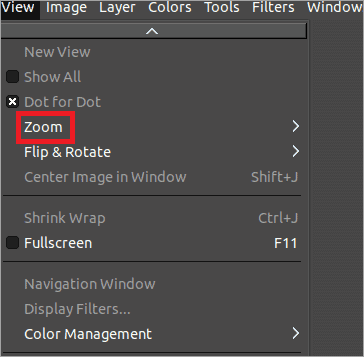
- Now, go to view and then select zoom to see how the image will look when zoomed.
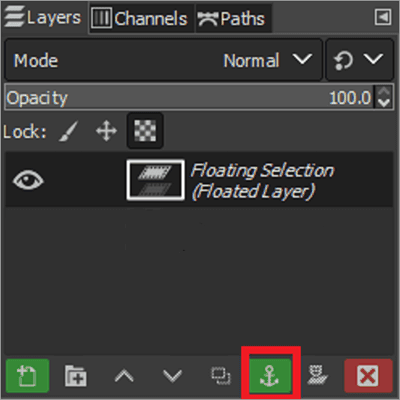
- If you are happy with the look, go to Layers dialogue.
- Select Floating Selection (Pasted Layer).
- Click on the Anchor icon at the bottom to lock it in the background.
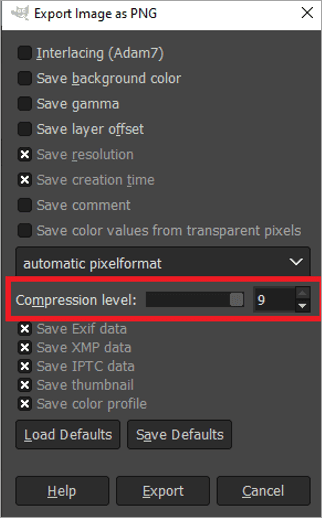
- Click on File and select Export.
- Select where you want to save it and click on Export.
- In the Export Image As dialogue box, move the compression level slider to zero.
- Select Export.
Using macOS Preview to Increase Image Resolution Without Photoshop on Mac
macOS Preview is a handy tool for editing images on Mac. Here’s how to make a photo higher resolution photo using macOS Preview.
- Right-click on the image file you want to edit.
- Select Open with.
- Click on Preview.
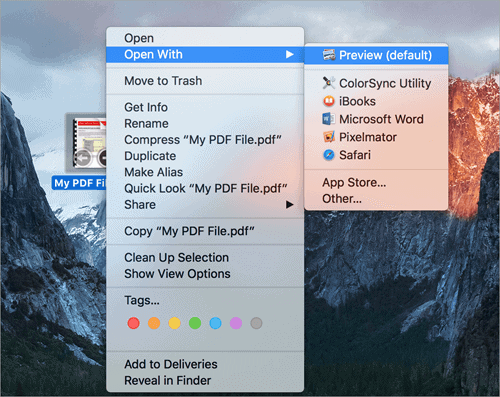
[image source]
- Select Tools.
- Click on the Adjust Size option.
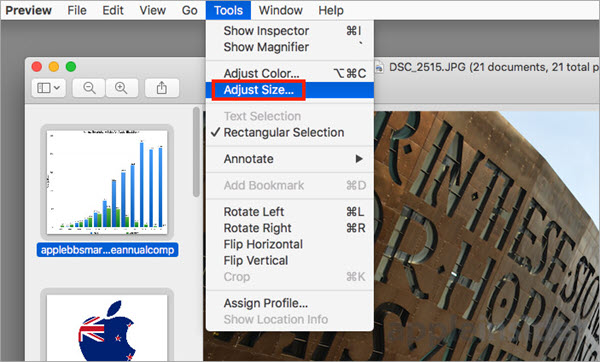
[image source]
- Adjust Width as per your need.
- Click OK.
- Select File.
- Click on Save to over-right the new file or export to save it as a new file.
Using Image Size on iPhone
Image Size is an iOS editing tool for resizing images on the iPhone. It is free to use, but you can opt for a premium account for an ad-free experience.
Here’s to increasing the resolution of images using the Image Size app:
- Download the Image Size and install it.
- Open the app and tap on the main white window.
- Tap OK to grant the app access to your gallery.
- Tap on the main window again to launch the image picker.
- Select the image.
- Tap on choose to open the image.
- Make sure the chain icon is locked.
- Set Width according to your requirements.
- Tap Done.
- Pinch and zoom to check the image quality.
- Tap on the gear icon.
![]()
- Move the Output Quality slider to 100%.
- For printing, increase the Print size correction factor.

- Tap on the back arrow to return to the main page.
- Tap on the save arrow to save the image.
With Picverse Photo Editor
Picverse photo editor is a simple tool for enhancing an image. Here’s how to increase image resolution using this app.
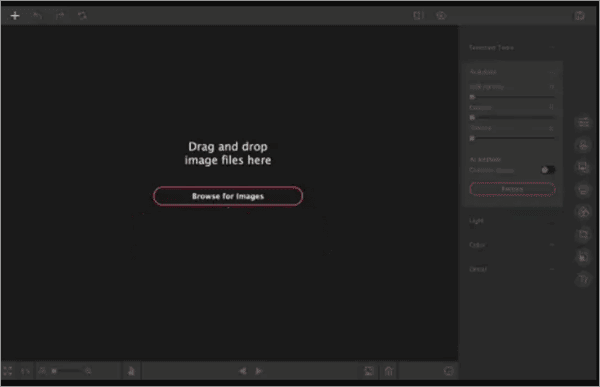
- Download and install Picverse Photo Editor.
- Launch the software.
- Upload the image you want to enhance.
- Click on More.
- Select Resize on the right-hand side panel.
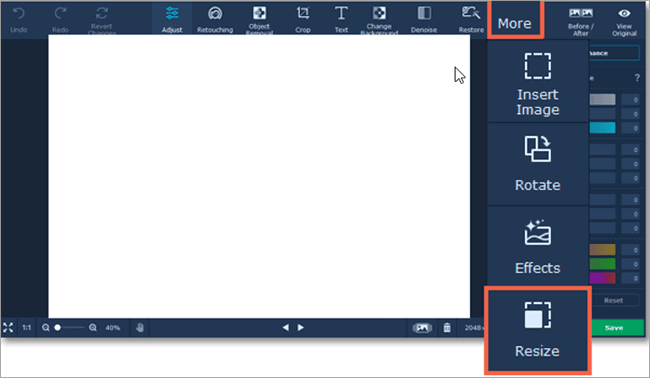
- From the dropdown menu, select Pixel.
- Insert a number in the width.

- Click Save.
You can also use one of the 9 preset sizes for easy and quick editing and use the AI Enlargement tick box to enhance the picture quality while resizing.
AppEase of UseProcessing SpeedQuality
Adobe PhotoshopEasyFastGreat
GIMPMediumFastGreat
mcOS PreviewEasyFastGreat
Image SizeEasyMediumGood
PicverseEasyFastGreat
How to Increase Image Resolution Online
There are sites like letsenhance or upscalepics that you can use to increase image resolution without using an app.
Here’s how to do it:
- Go to the upscalepics website.
- Click on Select Image.
- Pick the resolution you want to change it to.
- Choose the output format and compression level.
- Click on Start Processing.
- Download the image.
Frequently Asked Questions
Q #1) How do you make an image that has a higher resolution?
Answer: Increase the size of the image and make sure it has optimal pixel density. However, your image might not look as sharp as the original one. The bigger you make the image, the less sharpness it will have.
Q #2) How do I convert low-resolution photos to high-resolution?
Answer: The easiest way to convert a low-resolution image to a high-resolution photo is by using Adobe Photoshop. However, it is a premium app. If you want to do it for free, you can use GIMP.
Recommended Reading =>> Best Alternatives to Photoshop
Q #3) How many KB is high resolution?
Answer: There isn’t a set number of KB in a high-resolution image. The higher the resolution of your image, the bigger the file size will be.
Q #4) How many pixels is high resolution?
Answer: A high-resolution image is at least 300 pixels per inch.
Q #5) How can I increase the resolution of an image without Photoshop?
Answer: You can use GIMP or other similar image editing tools to increase the resolution of an image without Photoshop.
Q #6) How to increase a picture resolution on your phone?
Answer: You can use websites like Upscalespics or Let’s Enhance to increase the picture resolution on your phone.
Conclusion
So, now you know how to increase the resolution of an image by different methods. Unfortunately, sometimes, you might not get the size and quality you want even with them.
In that case, the best way forward is to select a better image, something you can work with. For resolution enhancement, Photoshop is always the best option. However, if you don’t want to pay for the service, you can also go for GIMP or other online image-enhancing tools.


