
How to enhance a photo – Picsart Blog
Nowadays, we tend to communicate with visuals. Whether it’s through captivating social media posts, a catchy flyer, or emojis in an instant message, using images is key to helping convey a thought or feeling. And if you’re a graphic designer or marketer looking to really get your message across, nothing is more crucial than having clear, crisp photos. But how do you enhance a photo? We’re covering that and more in this post.
Announcing AI Enhance
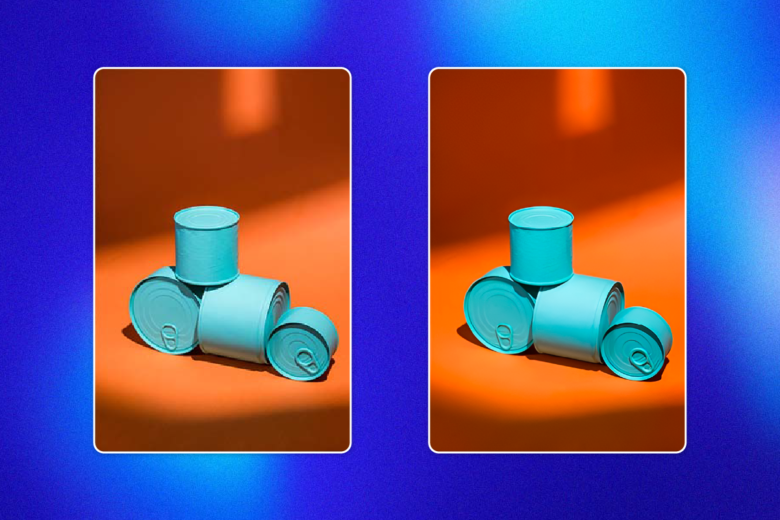
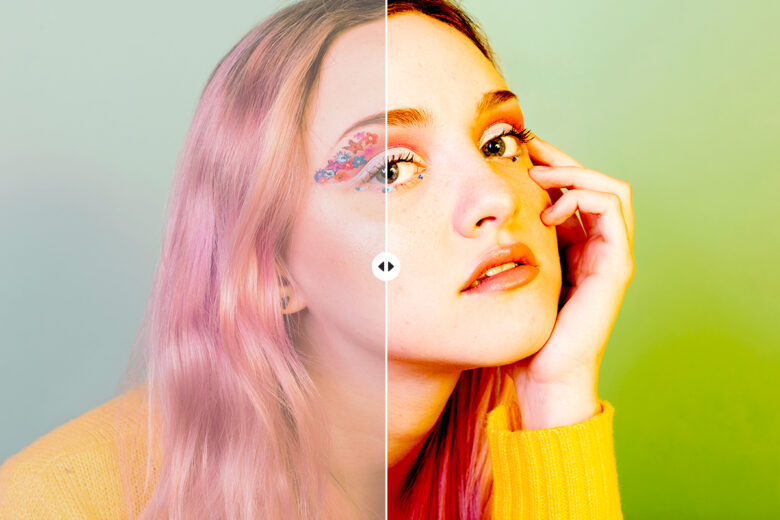
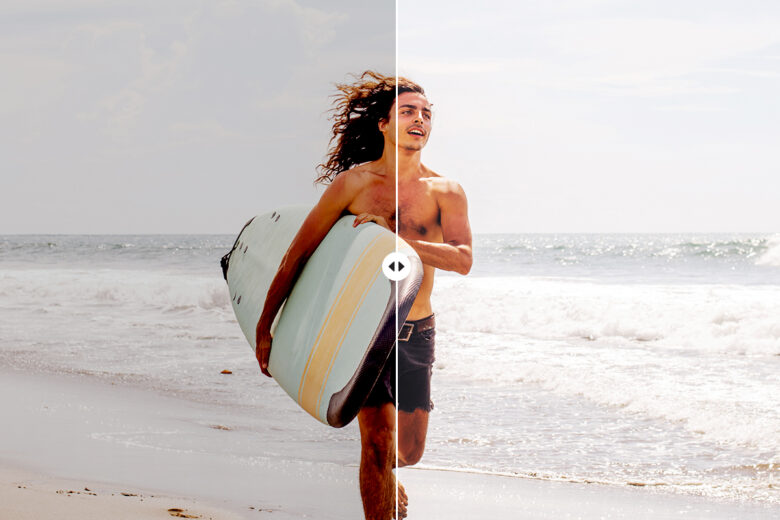
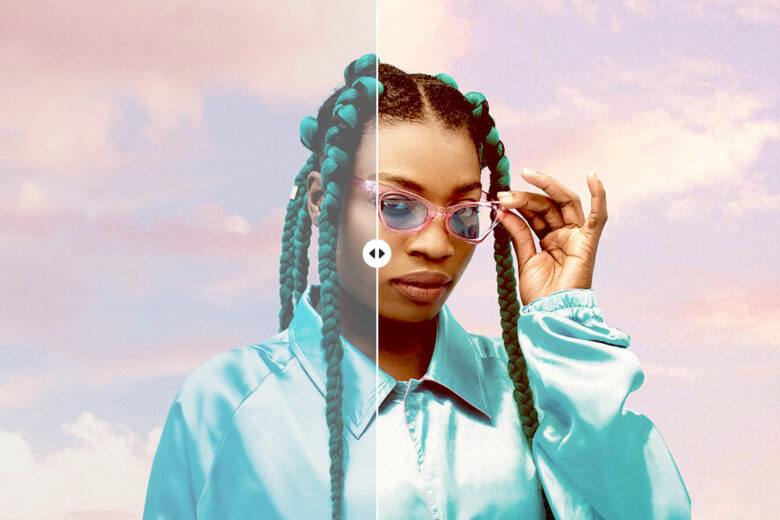
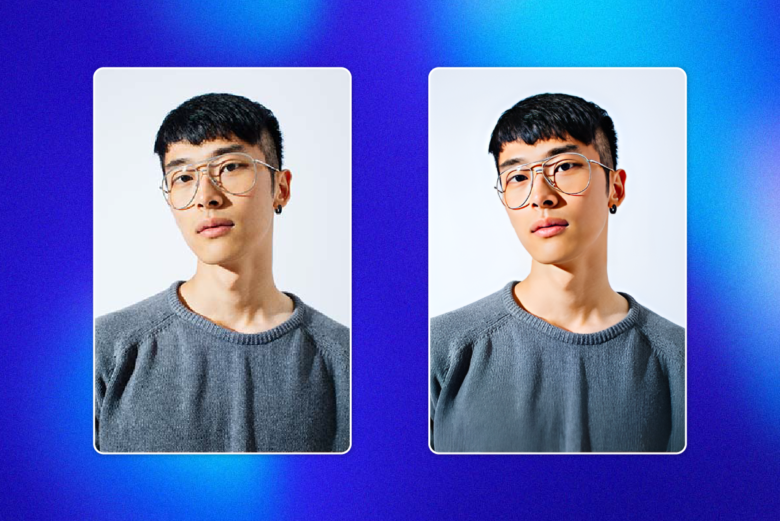
Today we’re excited to unveil AI Enhance. These industry leading image upscaling tools improve the overall quality of an image for printing or sharing online. It uses a generative AI model to add pixels, remove or blur pixelated effects, and sharpen and restore faces in any image. Just look for AI Enhance both in-app and on the web editor to try it on your photos. It’s also available in-app as HD Portrait in the Retouch tool (great for enhancing headshots) and via API.
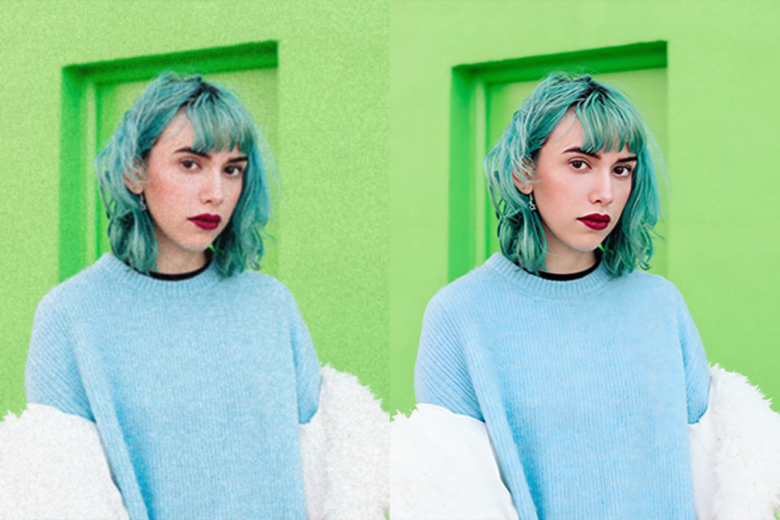
“Now we can apply our generative AI model to any image and increase the quality by up to 16x. And we’re excited to provide this ability to not only our creator community, but businesses using Picsart for Developers as well.” – Humphrey Shi, Chief Scientist at Picsart and Founder of Picsart AI Research.
What is image enhancement?
Image enhancement is a graphic design process in which you digitally adjust an image. This can include basic enhancements often found in your camera, like adjusting the brightness, contrast, clarity, and saturation of a photo. Other more advanced photo enhancement tools are found in photo editing platforms, spanning everything from photo filters and effects to noise reduction. And retouching tools like HD Portrait in the Picsart app allow you to enhance your image in a single click, making a low quality image look ready for a print magazine.
How to know if an image needs enhancement
Whether you’re posting a photo to your website, social media platform, or completing a design project, you should check the photo quality before publishing it. Below, we’ve broken down some high level key components of a good photo. This checklist will help you identify whether you need to enhance your photo quality.
Mục lục
Lighting:
Lighting is an essential component of good photo aesthetics. A dim photo can really hinder the fine details of your image. If you feel your photo is dull or dark, you should utilize lighting enhancement tools.
Color:
Color can be just as important as lighting. If the lighting is just right, but the saturation is off, you should use color correction tools to deepen the hues and tones and bring your photo to life.
Position:
Consider the position and orientation of the main subject in your photo. A simple crop to remove background clutter and unwanted objects can make all the difference. Cropping can also be used to emphasize your subject and enhance the overall feel of your composition.
Focus:
If your photo is low quality, grainy, or blurry, you’ll want to use image editing tools to sharpen and make your photo look crisp. If you have a crisp photo to start with, but want to place more emphasis on an element in it, you can also consider fine-tuning your image by adding a blur effect.
Design projects that require enhanced images
You’ll likely want to use a photo enhancer when it comes to personal or professional design projects that will be seen and shared by many. Let’s take a look at five common graphic design projects that often require enhanced images.
Websites:
A well-designed website is important if you want to make a good impression on your audience. This consists of a thoughtful combination of high quality graphics, various color combinations in line with your brand, text size, layout, and considerations for dark mode.
Remember, the details of your website design impact how your audience perceives you and your brand. Make sure your enhanced images are in line with your brand’s personality and tone. For example, if your brand’s personality is energetic, happy, and creative, you wouldn’t want brooding, darkened images on your website. Instead, you’ll want a bright and saturated image that evokes happiness.
Social media:
Social media is arguably the most ubiquitous medium to show the world who you are and what you have to offer. Instagram, for example, consists of millions of images displayed in a feed with an infinite scroll. So, what sets your photos apart? The answer starts with enhanced images. And beautifully enhanced images for your social posts and social media templates will definitely get more views and likes!
Moodboards:
A moodboard is a visual collage of graphics used to convey a general concept or represent the mood of an upcoming project. They’re useful across both personal and professional design projects, allowing you to visually communicate your vision with others. Thus, using enhanced images is key to putting together an effective moodboard that accurately displays your ideas.
Posters:
A poster is yet another design project that requires good photo aesthetics. If you’re creating a poster for an event, for example, you’ll most likely have a few key items displayed — an image, some text, and maybe a logo. It’s important to make sure that any images displayed are enhanced, clear, and beautifully displayed so your poster not only looks appealing but conveys the important message you want to get across. If you’re not sure where to get started, there are a ton of poster templates to start from.
Don’t forget, you can use the app or online photo editor tools to upscale your images before adding them to your poster design to make sure you have the best image quality.
Advertisements:
Whether it’s a billboard, magazine, or online advertisement, chances are you’ll be displaying an image in your design. A single advertisement can get quite wide reach and thus needs to include eye-catching enhanced images. The better the design, the more effective your ad will be.
Different ways to enhance an image
Now that you know why you might need to enhance an image, let’s dive into 11 different ways to enhance an image.
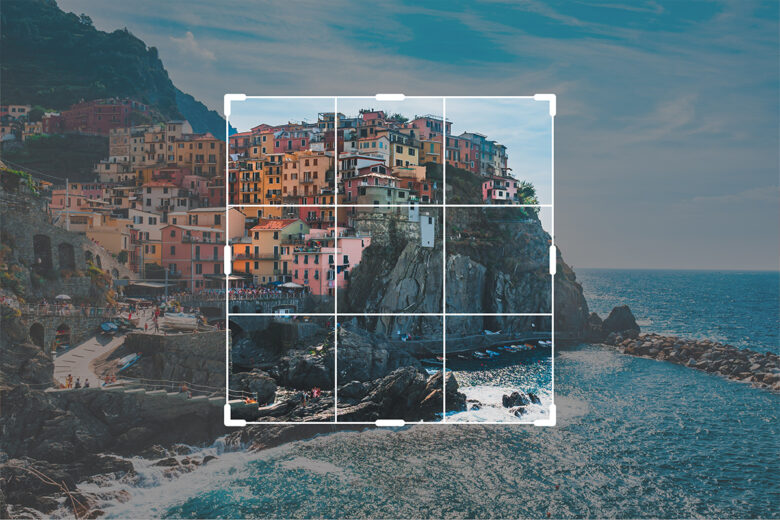
Crop:
The quickest and easiest way to enhance an image’s focus and composition is with a simple image crop. Cropping out unwanted clutter in the background allows you to emphasize the focal point of your image. Especially if you have one main subject in your photo, cropping out extra background provides a natural zoom and direct spotlight.
Blur:
Blurring the background of an image is another technique used to place focus on a specific element in your image. For example, if you have a city skyline photo with text overlay, you can enhance the photo by blurring the skyline to allow more emphasis on the text. Play around with the blur tool to create a more dramatic, smoothing effect or scale it back to where it’s only slightly enhanced.
Text:
Depending on your project, adding text can enhance your image. Select a complimentary font and font color and place the text in an appropriate spot on your image that does not interfere with the photo elements. Check out these 50 free fonts to get started.

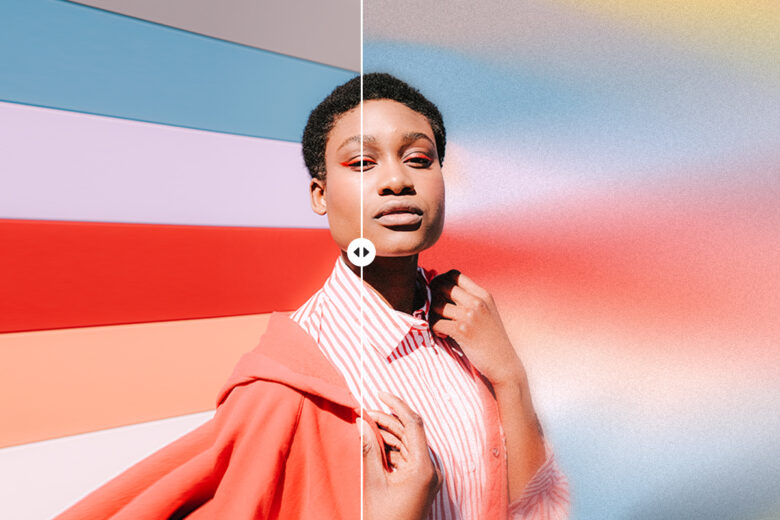
Saturation:
Saturation is a useful technique to enhance the depth of color in your image. Depending on how you use it, a saturation tool can either intensely deepen colors or fade them out. But, be wary of over-saturating your photo as it creates an unnatural and unappealing effect. When used just right, this tool will give your image a burst of color to bring it to life.
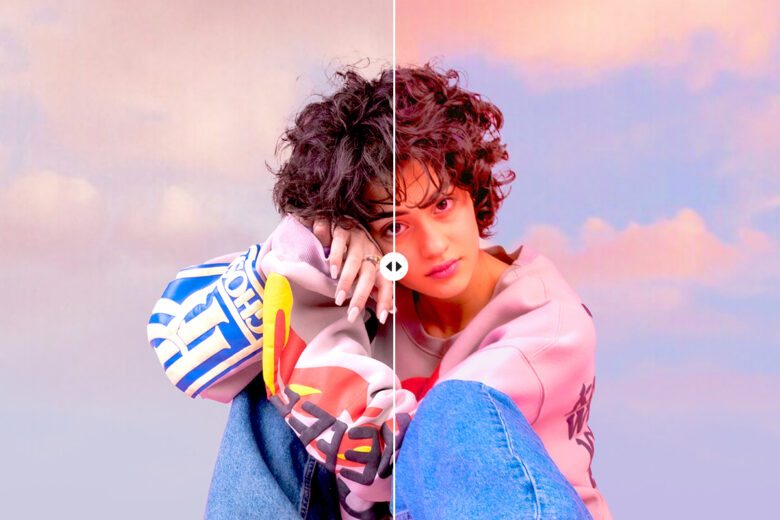
Contrast:
Similar to saturation, the use of contrast is a great way to elevate the intensity of your photo. Increasing the contrast intensifies the existing lighter and darker tones for a more dramatic effect. Reducing the contrast can flatten and even out the tone in your photo, which can be a great enhancement depending on your design goals. Again, be careful with scaling the contrast tool in either direction to avoid losing the details in your photo.
Brightness:
Lighting is a key component to good photography. If you can’t get the lighting right when you snap your photo, you can easily adjust it through brightness or exposure tools in photo editing apps. When it comes to using brightness tools, we suggest using the scale slowly as your photo could get too bright or too dark rather quickly. Start slow and adjust accordingly.
Filters:
Photo filters and presets have truly changed the photo editing world forever. With just a tap, a filter can transform your image in ways that would take significantly longer to manually achieve. If you’re going for a specific look, filters are a great way to speed up your photo editing process. For a detailed rundown on photo filters, check out How Do You Use Photo Filters?
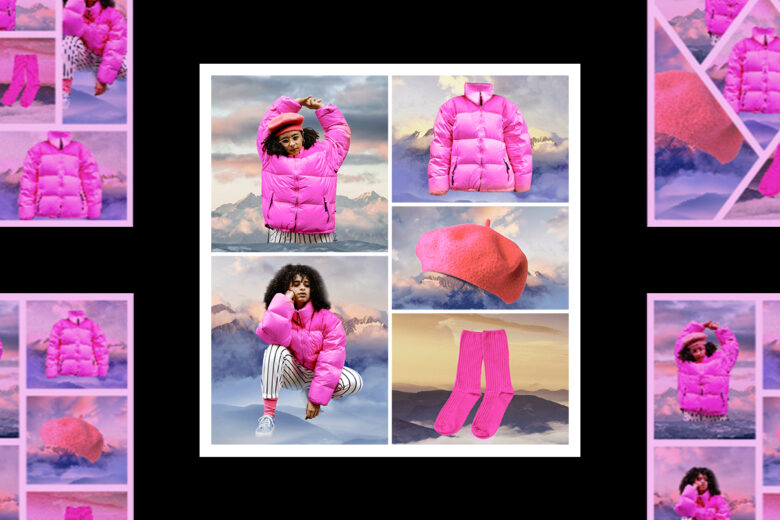
Collage:
An organized grid of images is a great way to showcase a moodboard or project that has multiple images. It provides a clean layout for your images to compliment rather than distract from one another. Most photo editing apps like Picsart have an array of diverse collage templates you can choose from. This is a great technique to enhance and organize multiple photos into one png or jpg file.
Upscale:
If you’re working with a low resolution image, the best way to enhance it is to first upscale your image. This will help remove any graininess and make it more crisp. If you’re planning to upscale your image, consider doing this first before layering on any other image enhancement tools.
Stickers:
This is one of the more unique editing tools to enhance an image. But, with Picsart’s practically limitless library of diverse stickers to choose from, you can elevate your image in a really special way. You can also create your own stickers to add to photos.
Retouch:
Retouch tools are more complex and intricate editing tools that are used to target specific areas of the face and body. These tools are especially useful for enhancing portrait style pictures where you can individually enhance facial features, like whitening teeth. The Picsart app has best in class Retouch features including editing tools like Face, Wrinkle, Smooth, Eye Bag, Blemish Fix, Hair Color, and Makeup.

What to Look for in a Photo Enhancer Tool
The most important thing to look for in photo enhancer tools is a wide range of features, settings, and functionality within each tool so you can scale as little or as much as you want. Luckily, Picsart‘s creative platform provides cutting-edge, easy-to-use photo and video editing tools!
How to Enhance a Photo with Picsart
Ready to enhance your photos? Here’s how to use the new HD Portrait tool to easily enhance a portrait photo.
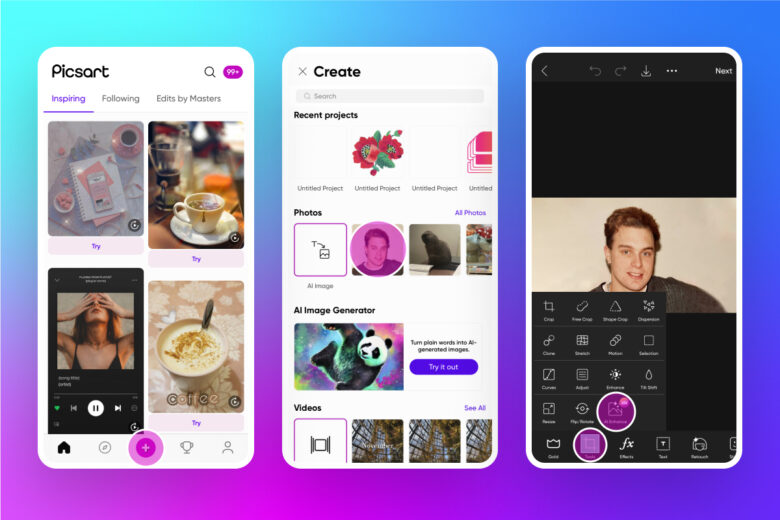
1) Open the Picsart app and tap on the plus sign (+) at the bottom of your screen. Upload the image you’d like to enhance.
2) Scroll across the Editor toolbar and select Retouch.
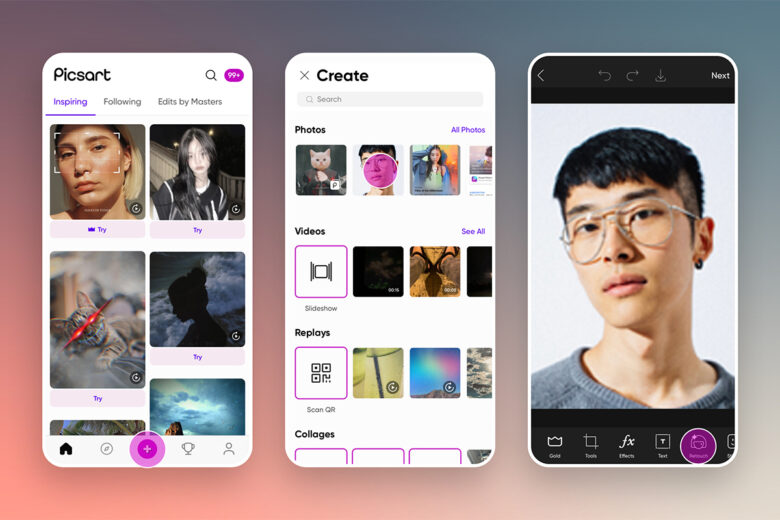
3) Tap on HD Portrait and adjust the level of intensity. When you’re done, tap on Apply to lock in your enhancement.
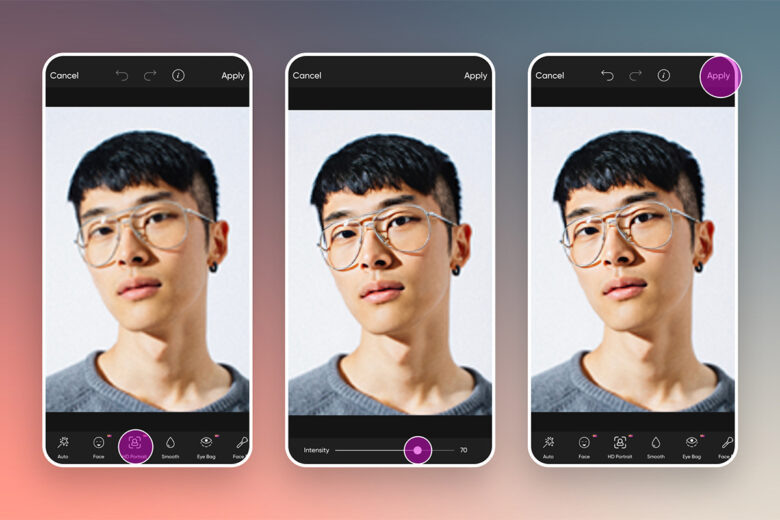
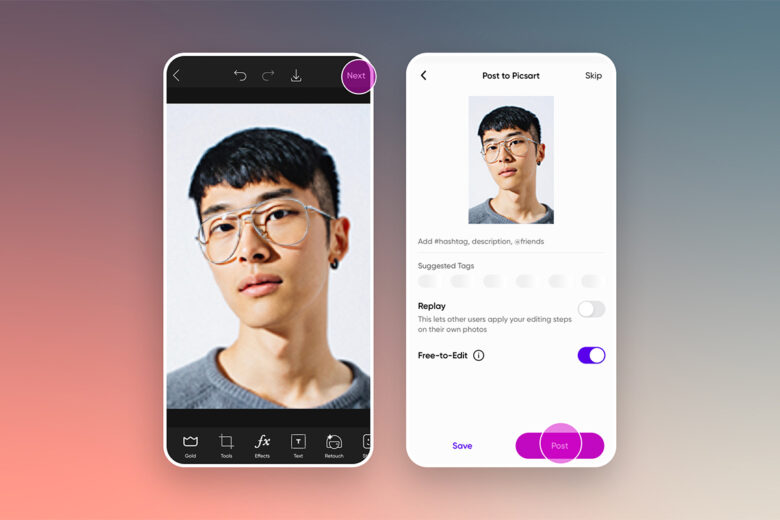
4) Make any other adjustments as needed. When you’re done, tap on Next and then save your photo to your device, share it on social, or post it to the Picsart community.
If you’re looking to enhance a photo in general, here’s how:
On the web:
1) Open the Picsart Web Editor and upload the photo that needs to be enhanced.

2) Now you’ll see your image in the photo editing experience. Click on AI Enhance in the upper toolbar.
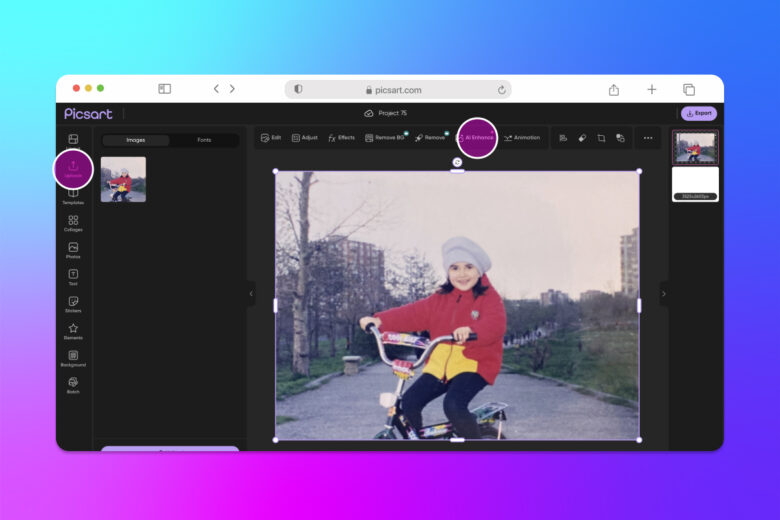
The AI Enhance tool will automatically enhance your image.
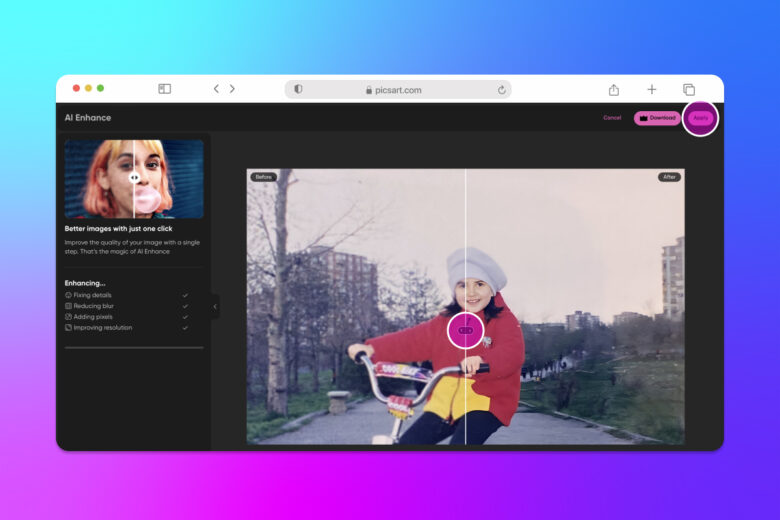
3) That’s it! You enhanced your image in just a few clicks. Now click on Export to download and save your image. You can also change the file format here as needed.
On mobile:
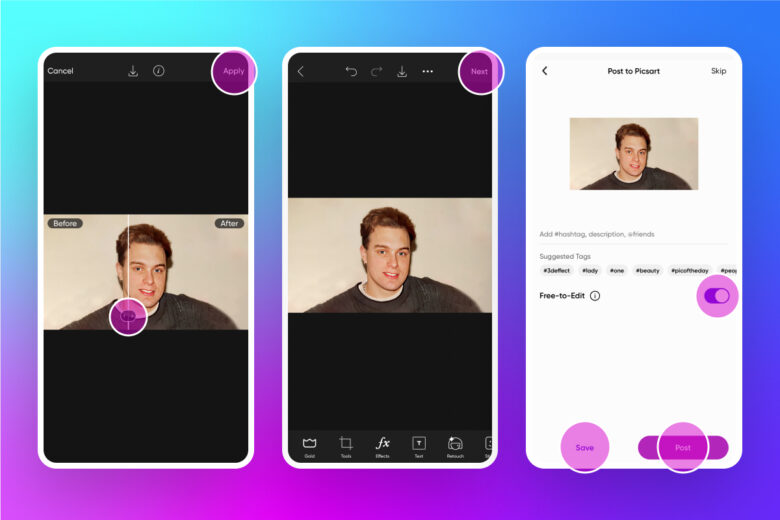
1) Open the Picsart mobile app and tap on the plus sign (+) to start a new project.
2) Tap on All Photos to select a photo from your camera roll to enhance.
3) In the Editor toolbar, select Tools, then AI Enhance.
4) Let the AI run its magic to enhance your photo, then tap Apply to save the work.
5) Tap on Next when you’re done editing, then Save your image to your device and/or Post your enhanced image to share with the Picsart community.
Picsart is a full ecosystem of free-to-use content, powerful tools, and creator inspiration. With a billion downloads and more than 150 million monthly active creators, Picsart is the world’s largest creative platform. Picsart has collaborated with major artists and brands like BLACKPINK, Taylor Swift, the Jonas Brothers, Lizzo, Ariana Grande, Jennifer Lopez, One Direction, Sanrio: Hello Kitty, Warner Bros. Entertainment, iHeartMedia, Condé Nast, and more. Download the app or start editing on web today to enhance your photos and videos with thousands of quick and easy editing tools, trendy filters, fun stickers, and brilliant backgrounds. Unleash your creativity and upgrade to Gold for premium perks!


