
Reduce PDF File Size and Control Quality for FREE With Standard macOS Tools

by Erik van der Neut
You have a high-resolution multi-page PDF document, but its file size is too large to share easily. How do you reduce the file size before you send it off?
Resizing PDFs
There are a variety of options for reducing the file size of your PDF file on Mac. Third-party apps specifically designed for this job are plentiful and web sites can do it for you for free. But, if you aren’t too keen on installing and paying for additional software or uploading your document to some web site, there is a way to easily do this on your Mac with tools that come standard in macOS.
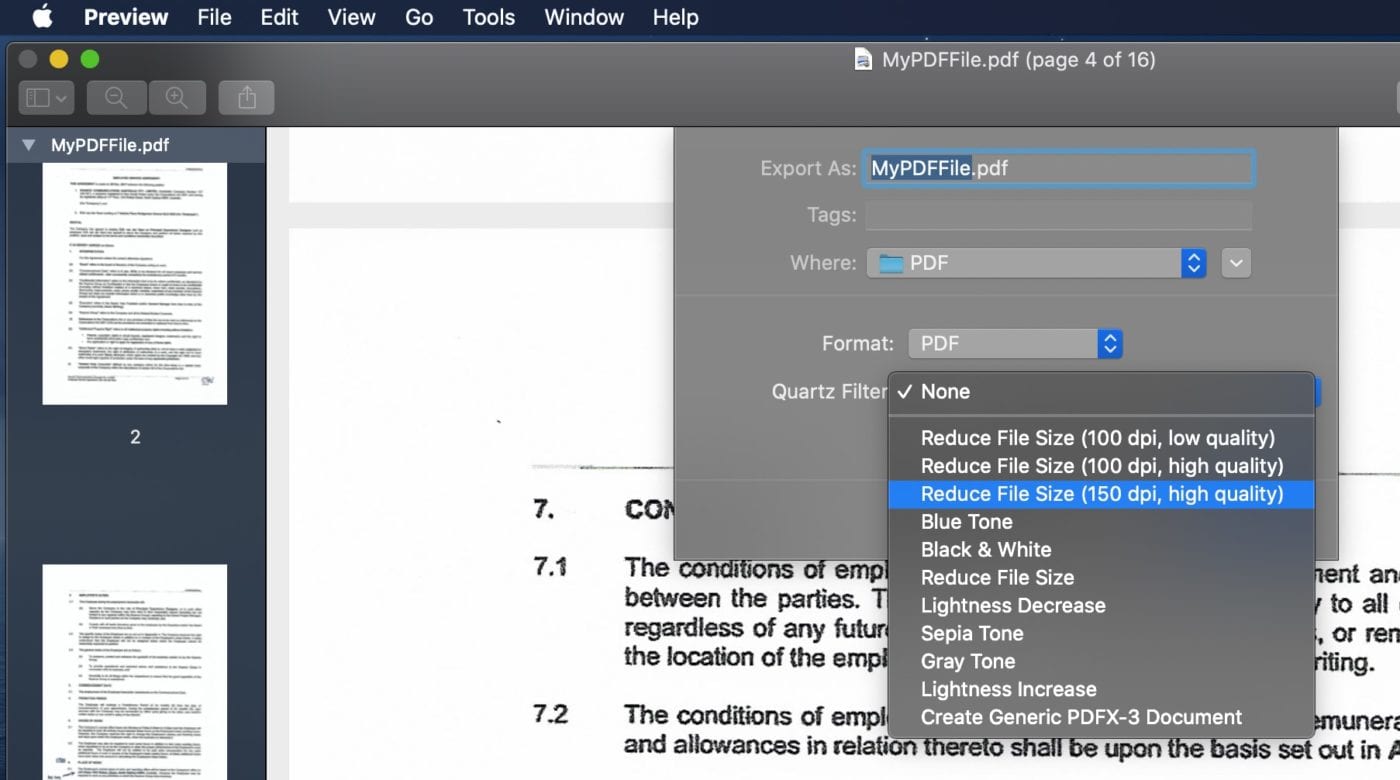
As mentioned in an earlier Rocket Yard post, in the Preview app on the Mac, you can select “File > Export…” and then choose the Reduce File Size option in the Quartz Filter dropdown in order to save your file with a much smaller file size:
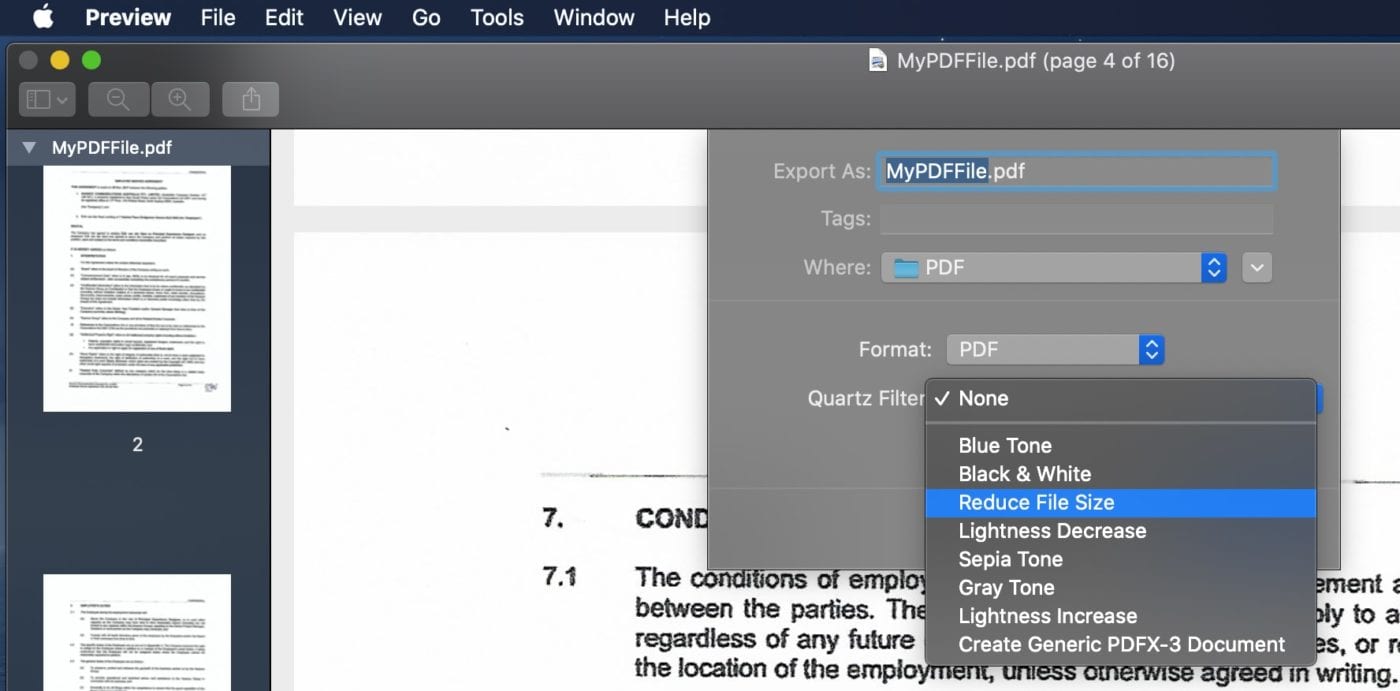
The problem here is that this standard option does not give you control over how much to lower the quality in order to reduce the file size, and this standard option will leave you with a very small file of very poor image quality.
ColorSync
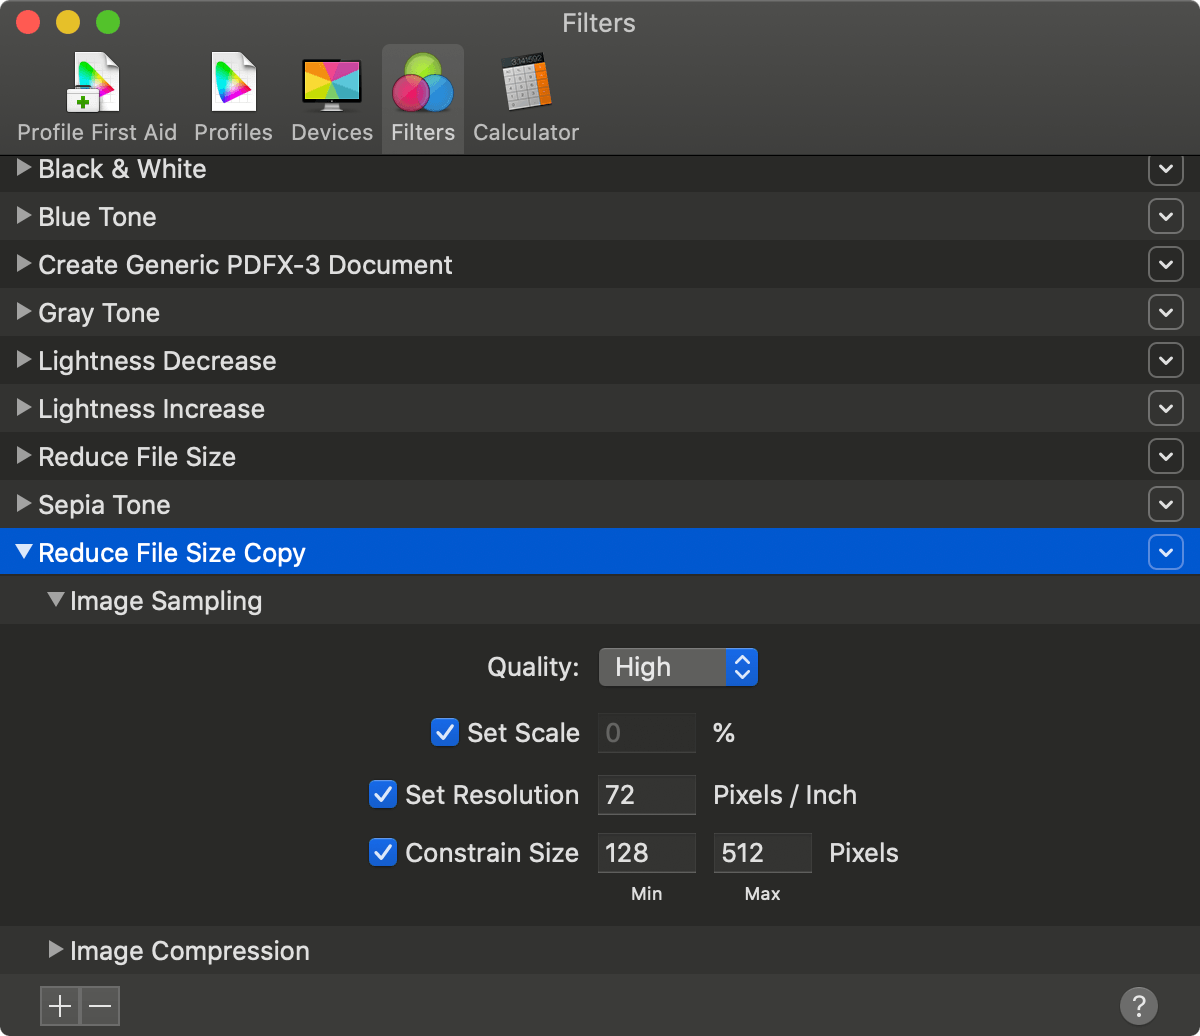
This is where the Mac standard ColorSync Utility can help you out. It is here that this Reduce File Size filter option is specified. You can inspect it and copy it and adjust the settings to create additional filter options.
By doing this, you’ll give yourself more filter options for the Preview export:
1. From “Applications > Utilities,” open the ColorSync Utility
2. Go to the Filters tab and find the Reduce File Size option in the filters list
3. Expand the filter by clicking the arrows on the left, so that you can see the details. The default option to “Constrain Size” is set to a max of 512 pixels, which explains why you are getting poor quality PDFs when reducing the file size in Preview. This setting is not just good enough for retaining any detail.
4. Click on the down arrow on the right of this filter and choose Duplicate Filter.
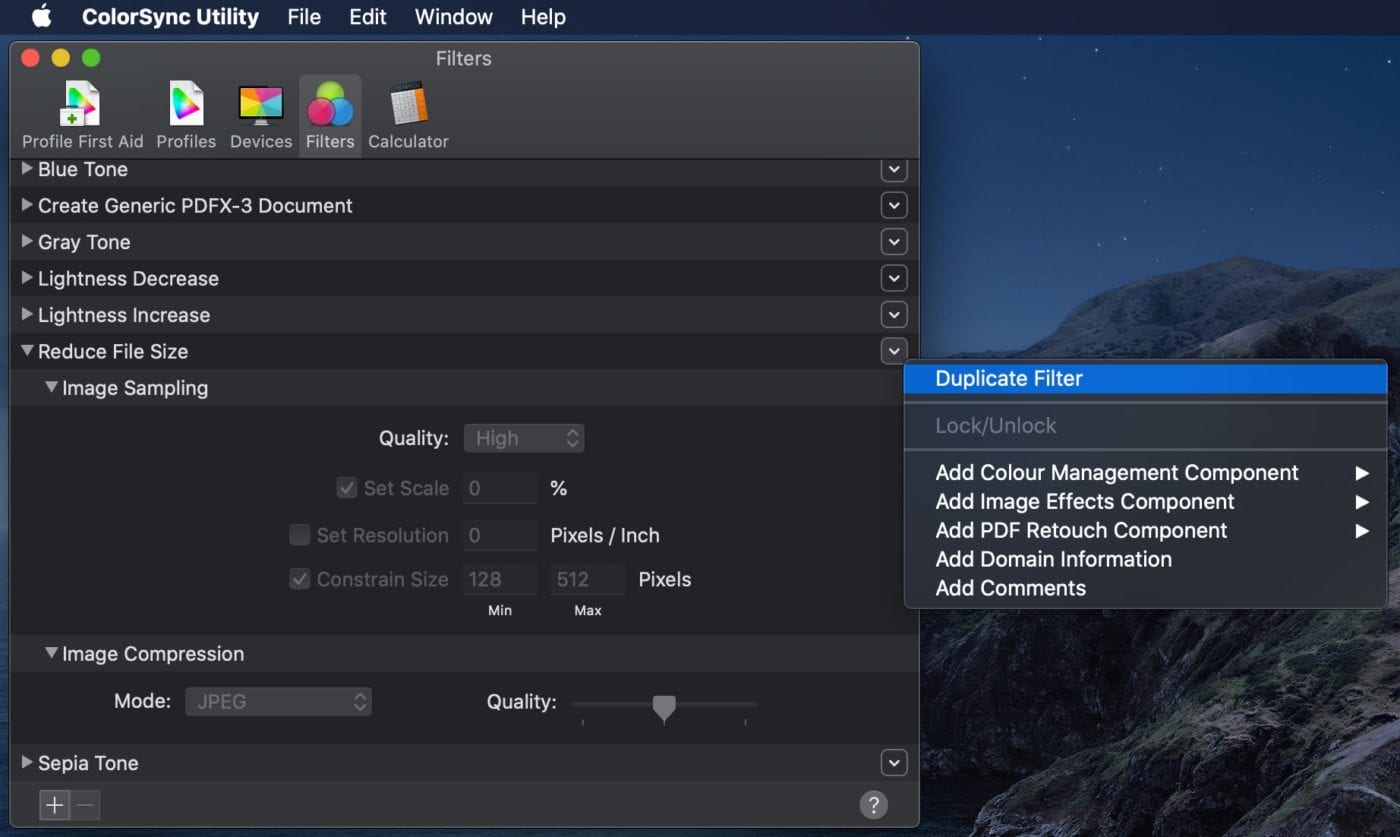
This will create a filter named Reduce File Size Copy at the bottom of the list.
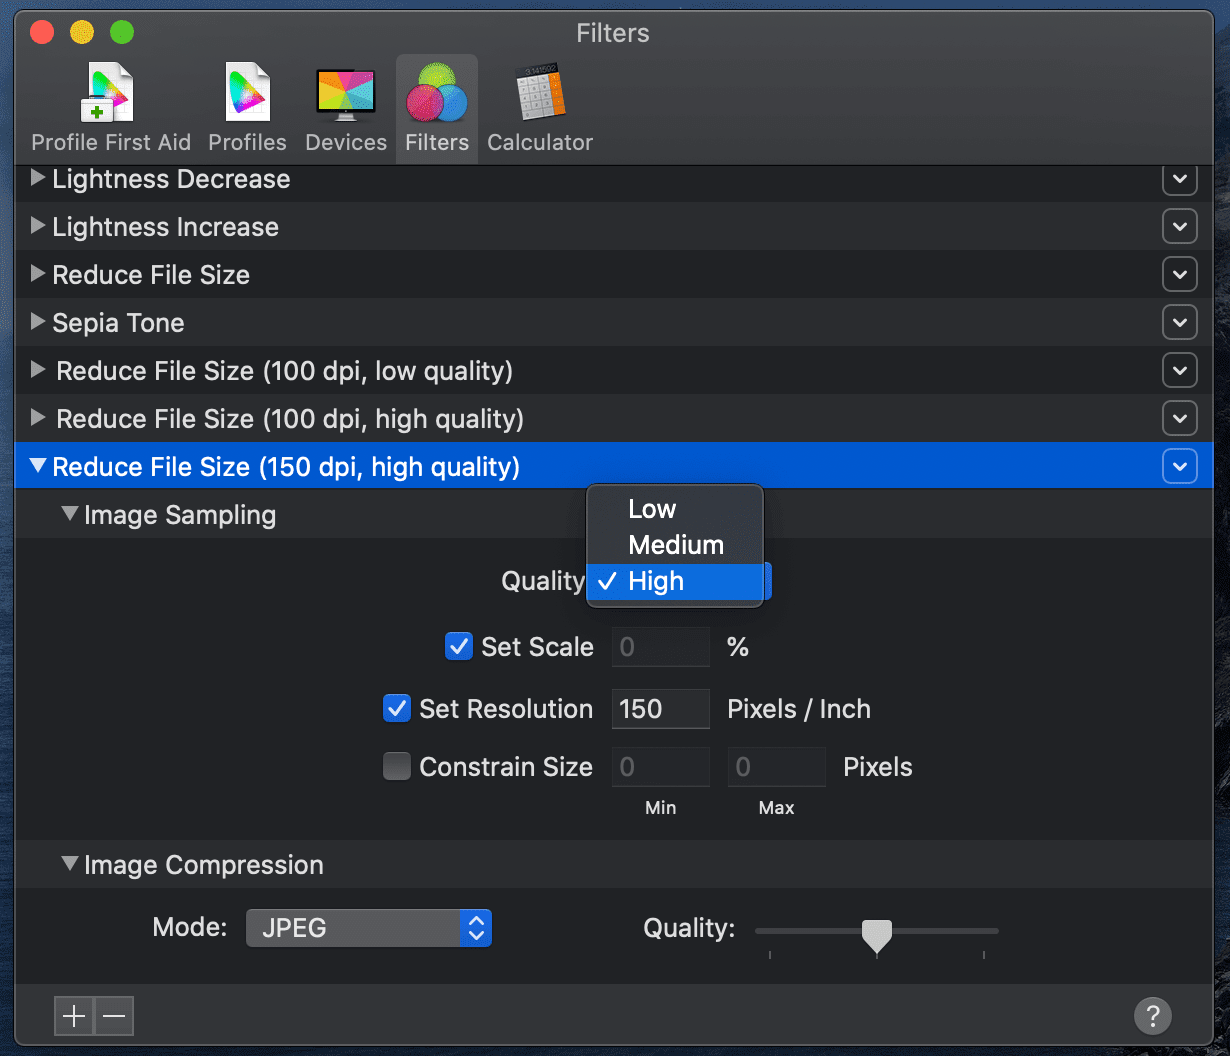
5. On the duplicated filter, select the arrow on the left to open it up and change its name and settings. To change the name, double click it. To create some different filter options, create a few with different Resolution and Quality settings.
For example, I have the following custom filters set up:
- Reduce File Size (100 dpi, low quality)
- Reduce File Size (100 dpi, high quality)
- Reduce File Size (150 dpi, high quality)
As soon as you create your custom filters, they will appear in the Quartz Filter dropdown of Preview’s “File > Export…” menu as well.
Super handy. No need for any 3rd party software, and no need to upload your documents to some web site to do this for you. And, you have a lot of control over how to reduce the size of your documents.
Hope this helps someone,
Cheers!


