
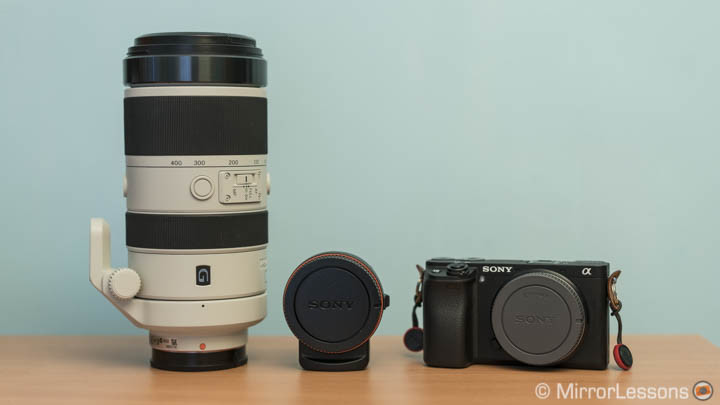
Sony a6300 vs. a6000 – The 30 Differences (Big and Small)
Even before we saw the new Sony a6300 for the first time at the Sony press event in Amsterdam, we knew it would have some pretty big shoes to fill. According to various best-seller lists and Sony itself, the a6000 is the best-selling mirrorless camera of all time. Why? Because with the price of only $800 with the kit lens upon its release, and $600 now that it is two years old, you get many high-end features such as a 24MP APS-C sensor, 11fps continuous burst, XAVC S video and fast focusing, all in a very compact body.
The new a6300 builds upon the success of the a6000, adding features such as a new advanced hybrid autofocus system with 425 phase detection points and internal 4K video to name just a couple. However, these improvements don’t come cheap: the a6300 currently costs about $1150 with kit lens included.
Being around double the price, it is natural to wonder whether an upgrade to the a6300 is justifiable. Here, we’re going to find out the answer by looking at all the differences, big and small, between the two models.
The Big Differences
01. Autofocus
Were I to set aside all else and mention only one improvement, it would be the autofocus system.
The Sony a6300 has a brand new 4D FOCUS™ hybrid autofocus system with High-density tracking AF technology that consists of 425 phase detection points and 169 contrast detection points. The phase detection points cover almost the entire surface of the sensor, allowing the camera to effectively track subjects regardless of where they move within the composition.
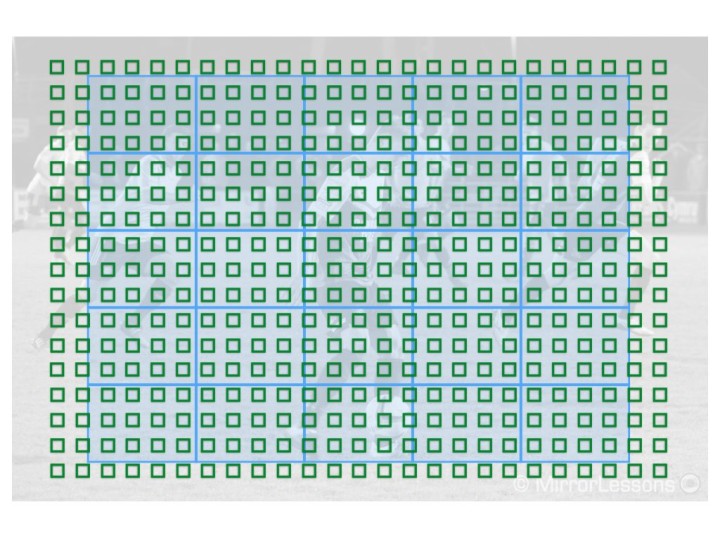
The a6000 too has a hybrid autofocus system but it consists of only 179 phase detection points and 25 contrast detection points.
Both cameras have the same AF-S, AF-C, AF-A, DMF and MF modes and the following Focus Area options:
- Wide – Activates all AF points across the frame. Good for unpredictable subjects.
- Wide + Lock-On AF – The same as Wide with the benefit of also being able to track your subject. Press the centre button on the control pad to activate Lock-On AF.
- Zone – Lets you activate AF points within a specific area of your frame. Gives you less coverage than Wide but more precision. Good for groups of subjects moving together.
- Centre – Good for predictable subjects that you can easily follow and are positioned at the centre of your frame.
- Centre + Lock-On AF – The same as Centre with the benefit of also being able to track your subject. Press the centre button on the control pad to activate Lock-On AF.
- Flexible Spot – Choose between a small, medium or large spot that you can move around the screen with the control pad to select a specific focus point. Good for static shots where you want to pinpoint the subject.
Note: In order to be used with Wide or Centre, Lock-On AF must first be turned on (Shooting menu, 6th page on the a6300, 5th page on the a6000).
Additionally, the a6300 benefits from:
- Expand Flexible Spot – The same as Flexible Spot with a fine border of phase detection points.
- Expand Flexible Spot + Lock-On AF – The same as Flexible Spot except that you can activate Lock-On AF tracking by pressing the centre button on the control pad.
In our tests with both cameras and the FE 70-200mm f/4 and FE 55mm f/1.8, we found that regardless of the Focus Area, the a6300 did a better job of tracking moving subjects.
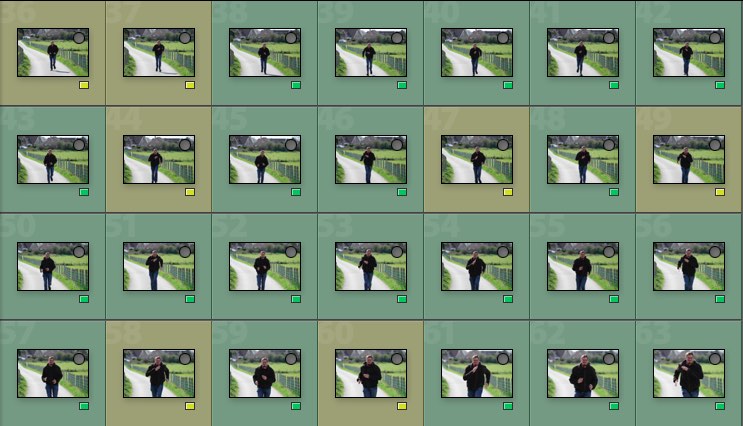
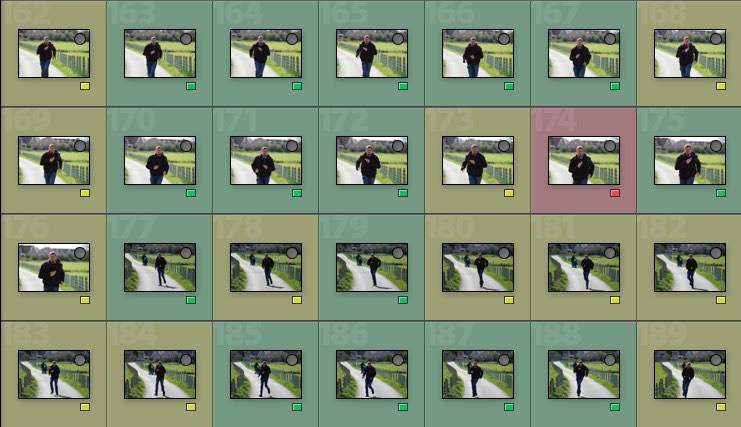
The a6300 produced an average of 75% perfectly in-focus shots and 25% slightly blurry shots. None of the shots were completely out of focus. The a6000, by contrast, gave us around 50% perfectly in-focus shots, 45% slightly blurry shots and 5% completely out-of-focus shots. Happily, it is quite rare to end up with completely out-of-focus shots from either camera.
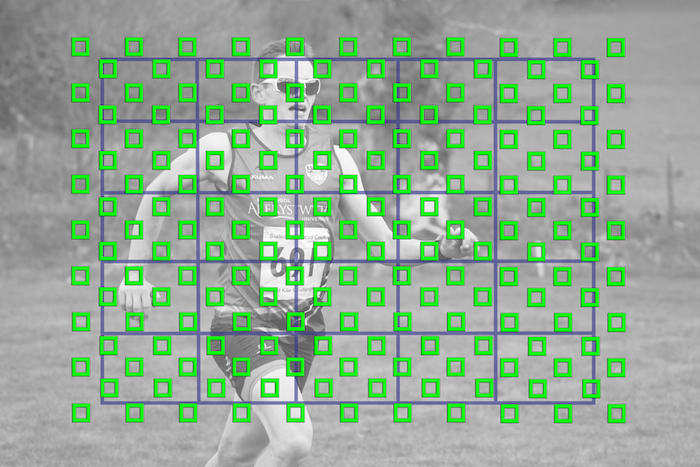
Below are two example series taken of Mathieu running towards me. Green means in focus, yellow means slightly blurry and red means out of focus.
Both cameras are able to regain focus after capturing a series of mis-focused shots, but the a6300 does it more rapidly and holds onto the focus for longer after that.
Thanks to the multiple phase detection points across the sensor, the a6300 also tracks more effectively when you use Lock-On AF with the Wide focus area. Very rarely does it lose track of the subject or hop over to another subject, something that happens more frequently with the a6000.
02. 4K Video vs. Full HD
The second massive improvement that could prove even more appealing to avid video shooters than the first point is the addition of 4K video to the a6300.
The a6300 is the first non-full-frame interchangeable-lens camera from Sony that is capable of shooting and recording internal high resolution 4K video (XAVC S at 100mbps) with full pixel readout and no pixel binning. To do this, the camera uses 20MP without cropping the sensor (except on the top and bottom) to get the Super 35mm format (16:9 aspect ratio). This corresponds to 6K of resolution that is then downsampled to 4K.

Regarding the Full HD capabilities, the a6300 can record in XAVC S up to 120fps. You also have the option of HFR which means that the camera will conform the footage to 25fps (slow motion) in-camera (but the bit rate is lower).
As for the a6000, it started out with only AVCHD and MP4 formats in Full HD, but thanks to firmware update 2.0, it now supports movie recording in the XAVC S format that supports high bit rates (NTSC: 60p/30p/24p PAL: 50p/25p).
The quality of the footage from the a6300 is clearly superior when shooting 4K: it has more sharpness and no aliasing or moiré. However, when shooting Full HD, you don’t get full pixel readout and we actually found the footage of the a6000 slightly crisper.
At high ISOs, the a6300 starts to have a clear advantage from 6400 ISO: the noise remains less invasive and the camera holds up surprising well up to 12800. Its sensitivity for video goes up to 25600 while the a6000 stops at 12800.
The a6300 also has the advantage of the picture profiles designed for video, including S-log2 and S-log3 gamma to record the widest dynamic range possible and colour grade in post production. When these gammas are selected, the minimum ISO available is 800. Both cameras have a clean 8-bit 4:2:2 HDMI output.
Below you can watch a brief comparison between the video quality of the two cameras.
Both cameras suffer from rolling shutter, though the a6300 seems to suffer a little more. The new camera also has issues with overheating when recording 4K. It happened to us several times after 15/20 minutes of continuous shooting.
One of the few disappointments of the a6000 was the electronic viewfinder (EVF), whose 1,440K-dot resolution was actually a downgrade from that of its predecessor, the NEX 6. The a6300 has remedied the situations with its new XGA OLED electronic viewfinder. Although the size (0.39″-type), field coverage (100%) and magnification (0.70x) remain the same, the resolution has been boosted back up to 2,359K-dots.
Another significant improvement to the EVF (and LCD) of the a6300 is support for uninterrupted Live View in continuous shooting mode up to 8fps. Instead of showing the last picture taken, the camera keeps the live view with partially transparent blackouts (occasionally 1 or 2 frames end up completely black). This allows you to follow the action more easily if you are dealing with slow to medium paced subjects such as runners, soccer players, or even motorbikes. However, the constant changes in brightness due to the blackouts can be annoying, especially when tracking very fast moving subjects like birds in flight.
The a6000’s EVF, on the other hand, doesn’t show a live view but rather, the last picture taken. You don’t get any blackouts but as a result there is a slight lag between what you see in the EVF and what happens in the scene.
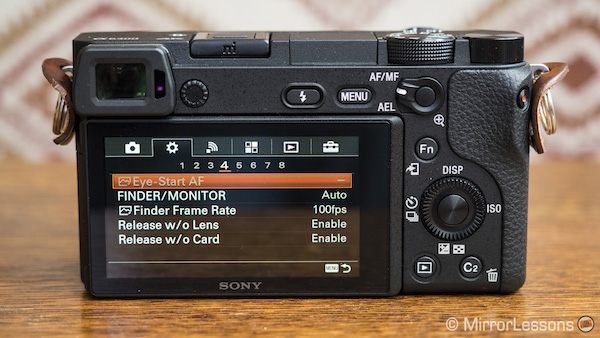
The a6300 also has the option of setting the EVF frame rate to 100fps for PAL (or 120fps for NTSC). You get a more fluid view of your scene which is especially helpful when shooting in low light.
Note that neither camera comes with a proper eye cup. If you use glasses, we suggest that you purchase one.
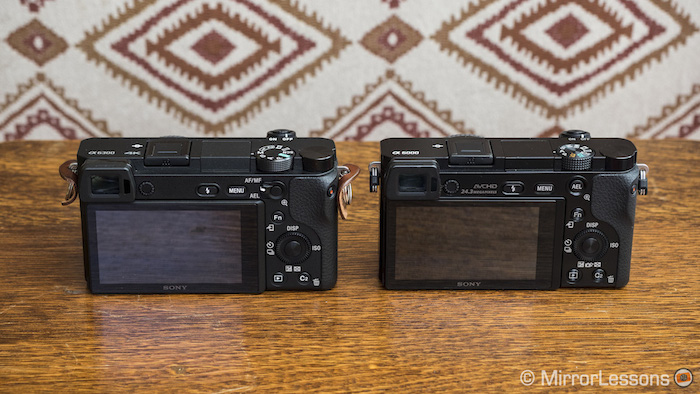
04. Improved build and weather-resistance
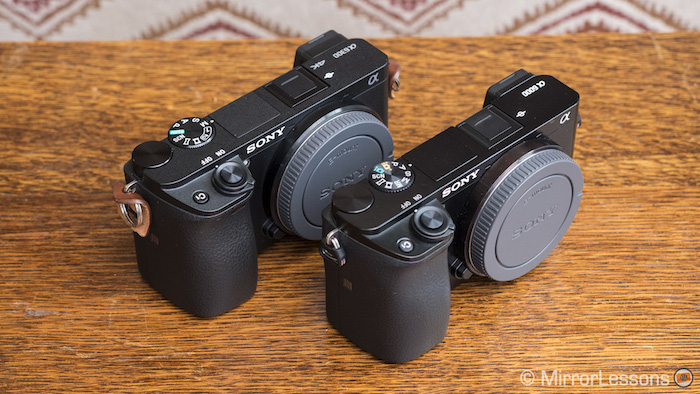
A semi-professional body deserves a robust build, and that’s exactly what the a6300 received. Although it highly resembles the a6000 in terms of design, it has the added benefit of a tough magnesium alloy body and dust/moisture resistance (but not complete weather sealing).
It is also a little heavier – 404 grams with the memory card and battery versus the 344 grams of the a6000 – and has a slightly chunkier grip.

The strength and rigidity of the mount has also been improved. When mounting and un-mounting lenses, I have noticed that the a6300’s mount does indeed feel more robust than that of the a6000.
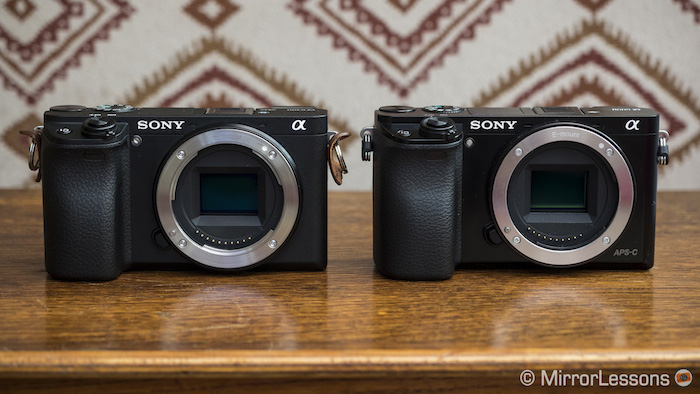
05. New EXMOR sensor and BIONZ X processor
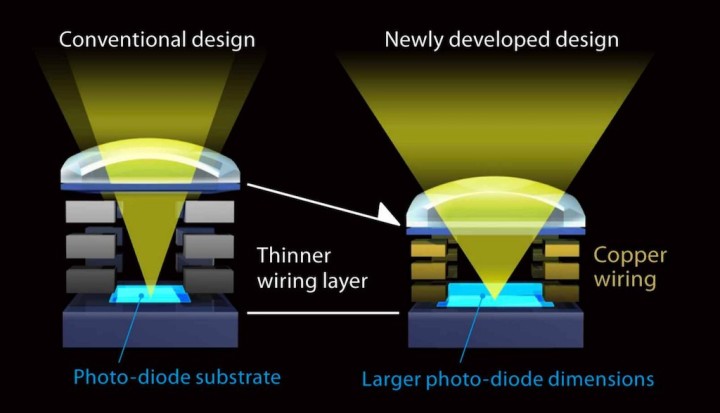
The a6300 has a brand new 24.2MP APS-C sized Exmor CMOS sensor, which actually has slightly less resolution than the a6000’s 24.3MP sensor. It employs copper wiring and enhanced circuitry to improve light collection efficiency and capture low-noise images with a wide sensitivity range up to ISO 51200. According to Sony, the use of copper “raises readout speed as well as the potential of advanced 4K and Full HD 120fps shooting.”
Also new is the high-speed BIONZ X processor, which has been optimised to deliver better resolution especially at higher sensitivity when coupled with the new image sensor.
We compared images taken with the two cameras taken side-by-side and noticed a few interesting differences.

First, we have resolution and noise. From ISO 100 to 6400, the differences are very small. The resolution is excellent and the noise is well-controlled on both cameras. You can see how similar the performance is from the following side-by-side 100% crops taken at ISO 800.
It is only once you reach ISO 12800 and 25600 that the a6300 shows a tangible advantage over its predecessor. The a6300 controls chroma and luminance better than the a6000, and even has an extended value of ISO 51200 which performs much like ISO 25600 on the a6000.
You can see a full high resolution high ISO gallery here.
A similar tendency can be observed from the OCC JPGs. Since noise reduction (NR) is can be quite aggressive, I would suggest setting it to Low or even Off to retain as much detail as possible.
Second, the white balance algorithm seems to be different on the a6300. When both are set to auto white balance, the a6000 files seems to have more of a yellowish-green tint while the a6300 files tend towards a magenta tint, especially under artificial light. A similar tendency is visible when the two cameras are set to the same Kelvin value, though it isn’t as pronounced.
- Slide to the right: a6300 AWB
- Slide to the left: a6000 AWB


- Slide to the right: a6300 AWB
- Slide to the left: a6000 AWB


The a6300 also provides 14-bit RAW output but it isn’t uncompressed as many were hoping. The a6000 produces 12-bit RAW files by contrast. If we try to post process a RAW file heavily to recover as many details as possible in the shadows and highlights, we can clearly see that the a6000 version produces more noise, colour shift and banding.

06. Focal plane phase-detection for DSLR lenses
Like the full-frame Sony A7r II, you can take advantage of the a6300’s 425 phase detection points, enhanced tracking and focus accuracy with A-mount lenses as long as you have a mount adapter like the LA-EA3.
However, when we tested the 70-400mm f/4-5.6 G SSM II with the a6300 on a runner and our beloved red kites, we found that it wasn’t as accurate or fast as an E-mount lens. In particular, it struggles in continuous AF when following fast moving subjects at medium or short distances. This echoes our experience with the A7r II and other A-mount lenses.
You can also use an EF to E-mount adapter such as the Metabones Mark IV or the new Sigma MC-11 to use Canon or third-party EF lenses. Remember that the performance may vary depending on the adapter and lens used. Also not every lens is compatible so make sure to check the compatibility list provided by the manufacturer.
As for the a6000, the only way to use A-mount lenses and benefit from phase detection is by using the LA-EA4, an adapter that houses a dedicated phase detection autofocus sensor. Overall, we’ve found it quite slow and imprecise, and certainly not well-suited to fast-moving subjects. The same applies to EF lenses and AF adapters as well.
To tell the truth, we wouldn’t recommend investing in A-mount lenses (especially large ones) for use with either camera. They are too front-heavy for small crop bodies, and the performance doesn’t justify the investment. It only makes sense to use A-mount lenses if you already own some for your DSLT camera, or if you need a specific focal length/range that doesn’t yet exist in an E-mount version. (And even then, it might make more sense to use the Metabones EF-E Smart Adapter IV with Canon / Sigma EF lenses because they are easier to find second-hand and tend to be more affordable than A-mount lenses.)
07. Silent shooting mode

This may seem like a small addition but a silent electronic shutter can actually makes a huge difference to your shooting experience.
Not only does it allow you to shoot discreetly at events where the sound of a shutter would be audible, such as a church service or theatre performance, but it also reduces shutter shock at slow shutter speeds. Remember that the electronic shutter can produce a rolling shutter effect with fast moving elements.
Bear in mind that while the silent shutter is limited to the a6300, both cameras have a first-curtain electronic shutter that can help to reduce vibration caused by the mechanical shutter.
08. Price
Usually we save the price until the end of our articles but there is no doubt it is one of the bigger differences between the two models. At $600 brand new with the 16-50mm kit lens, the a6000 costs about $550 less than the a6300 with the same kit lens, and even less if you find it second-hand. You can also find special deals on the a6000 with two lenses.
Given that the overall image quality is quite close, those who don’t care about having the best AF performance or 4K video may be just as happy with the performance of the a6000.
The Little Differences
Whereas the a6000 has 7 customisable buttons that are only available in shooting mode, the a6300 has 9 customisable buttons in shooting mode plus 2 in playback mode. You can assign any one of 64 functions to these buttons on the a6300, while you are limited to 44 options on the a6000.
10. Memory Recall 1 and 2

An excellent addition to the a6300’s mode dial are the Memory Recall 1 and 2 options to which you can register your favourite or most frequently used settings. Once you’ve saved your presets to Memory, all you have to do is turn the mode dial to either 1 or 2 to have immediate access to them.

For example, I saved my settings for action photography (1/1000s, f/2.8, C-AF, Zone, Hi burst, JPG only) to MR 1 and my settings for landscape photography (1/250s, f/8, S-AF, Single shot, Flexible Spot) to MR 2.
You can also save an additional four presets (M1 to M4) which can be accessed from either MR 1 or 2.
The a6000 only has one Memory Recall option on the mode dial and it gives you access to three different saved presets within a menu. Since the Mode Dial Guide will always display when you first turn the dial to MR, I would suggest turning it off in the menu to access MR more rapidly.
11. Extra fine JPG option
Within the Quality sub-menu on the a6300, there is now an Extra Fine JPG option which didn’t exist on the a6000. This means that you will see less compression than with the Fine option. Keep in mind that when you choose RAW & JPG, the quality automatically drops to Fine.
12. ISO Auto Minimum Shutter Speed
When shooting in Program (P) or Aperture (A) mode on the a6300, you can now set the shutter speed at which the ISO sensitivity starts changing. It is useful for moving subjects because you can minimise subject blurring while preventing camera shake.
The menu gives you the option to either choose the specific shutter speed at which Auto ISO kicks in, or to select between Slow / Slower / Standard / Fast / Faster options.
13. Hi+ continuous burst
On the a6300, the 11fps continuous burst option also found on the a6000 has been renamed from High to Hi+. High now refers to 8fps and differs from 11fps in that it gives you a continuous Live View of your scene as mentioned in point 03.
14. Focus and release priority in AF-S and AF-C

Sports and action photographers will be happy to know that you can now switch between Focus and Release priority in AF-S and AF-C on the a6300. There is also a Balanced Emphasis option that shoots with equal weight given to focusing and shutter release.
I usually stick with Focus priority since I’d rather not end up with hundreds of out-of-focus images on my hard drive, but seasoned sports and action photographers who are highly attuned to their subject’s movements may feel that taking the image is more important than having a perfectly in-focus shot.
15. Better buffer in JPG mode
The a6300 has a better buffer than the a6000 in JPG mode but in RAW & JPG mode, the performance is about the same. Below are a couple of example bursts I took with the two cameras using the Lexar 64GB Lexar Professional 1000x SD (SDXC) card:
11fps / AF-C / Fine JPG
- a6300: 76 images taken in 10 seconds. Slowed down after 5 seconds but continued to shoot. Took 9 seconds to record to memory card.
- a6000: 60 images taken in 10 seconds. Slowed down after 4.5 seconds but continued to shoot. Took 15 seconds to record to memory card.
11fps / AF-C / RAW & JPG
- a6300: 29 images taken in 10 seconds. Slowed down after 2 seconds but continued to shoot. Took 18 seconds to record to memory card.
- a6000: 29 images taken in 10 seconds. Slowed down after 3 seconds but continued to shoot. Took 18 seconds to record to memory card.
16. AF in Focus Magnifier
To make fine adjustments to focus while shooting macro on the a6300, you can now use autofocus even while enlarging a given area of your screen.
17. AF Area Auto Clear
This new option on the a6300 lets you decide whether the focus area should be displayed all the time or if it should disappear after focus is achieved. It doesn’t work in AF-C because the camera is constantly trying to acquire focus in this mode.
18. Better Eye Detection
Though both cameras come with Eye Detection, Sony has greatly improved its performance on the a6300.
Whereas on the a6000 you could only use it in AF-S, you can now use it in AF-C on the a6300. What’s more, the AF point no longer has the tendency to lock onto unrelated body parts (ears, forehead, nose), though it does pick the wrong eye on occasion.
Keep in mind that you must assign Eye AF to a customisable button to able to use it on both the a6000 and a6300. I personally wish that Sony would move it to the Smile/Face Detection menu since I’d rather keep the customisable buttons for other features.
Below you can find a portrait of Mathieu taken with the Eye AF of the a6300. As you can see, the eye closest to the camera is perfectly sharp.
19. Dual video REC

Dual Video REC allows you to simultaneously record an XAVC S movie and an MP4 movie, or an AVCHD movie and an MP4 movie. This new option does not appear on the a6000.
20. Marker Display and Settings for movies
On the a6300, there are a number of Marker Settings you can choose to activate. They are as follows:
- Centre – Choose whether or not to display the centre marker on screen. (On / Off)
- Aspect – Choose the aspect marker display. (Off / 4:3 / 13:9 / 14:9 / 15:9 / 1.66:1 / 1.85:1 / 2.35:1)
- Safety Zone – Set the safety zone display. (80% / 90% / Off)
- Guideframe – Choose whether or not to display a grid. (On / Off)
Once you’ve activated the ones that interest you, you can use the Marker Display option to either turn them on or off. If you use this option a lot, it is best to assign it to a custom button.
21. Gamma display assist
Since movies recorded in S-Log are generally destined to be post-processed to make use of the wide dynamic range, they are usually displayed with low contrast during recording. What the a6300’s Gamma Disp Assist does is let you preview that missing contrast on the monitor and viewfinder while you shoot and when you play back your videos. You can choose between Off, Auto, S-Log2 or S-Log3.
22. Enhanced Zebra function
Both cameras have a Zebra pattern option that goes from 70 to 100+. The higher the value selected, the more the camera will display patterns in the brighter areas of your image.
On the a6300, you have two additional custom modes to help you monitor the exposure better when recording video in S-log2 and S-log3. You can target a precise signal brightness level (from 0% to 109%) and set a brightness range in +-10 levels. The pattern will indicate areas in your frame with the specific level of brightness you set. You can also set a minimum value for the brightness level (from +50 to +109).

23. HDMI output
In addition to selecting the output format for the HDMI port (4K, 1080p or 1080i) when playing back your images or video clips on a TV monitor, there is a “4K Output Selector” option on the a6300 for filmmakers who wish to record their footage on an external recorder. You can decide to record simultaneously on the internal memory card while outputting the video signal via the HDMI port or to output the 4K signal without recording to the SD card.
On the a6000, you will find the 4K still image playback option only. It outputs still images in 4K resolution to an HDMI-connected TV that supports 4K.
24. Support for line input from professional audio devices
Both cameras feature Sony’s Multi-Interface shoe on top that make them compatible with several Sony accessories such as a microphone (ECM-XYST1M) or an XLR adapter kit (XLR-K2M / XLR-K1M).

An exciting addition to the a6300 for video shooters is the microphone line input (3.5mm Stereo minijack).
25. Release without card
Since it is unlikely you’ll want to take pictures without a memory card, the a6300 now gives you the option of enabling or disabling release without card. On the a6000, the camera takes a picture regardless of whether you insert a card or not.
26. Display quality
On the a6300, you can now change the display quality between High and Standard. Keep in mind that High will consume more battery life than Standard.
27. Demo Mode
This new mode displays protected AVCHD movies recorded on the memory card automatically when the a6300 has not been operated for about one minute. It can only be used when the camera is connected to an AC Adaptor.
28. Time Code (TC) / User Bit (UB) settings
With the a6300, you can record Time Code and User Bit information as data attached to movies.
29. Set file name
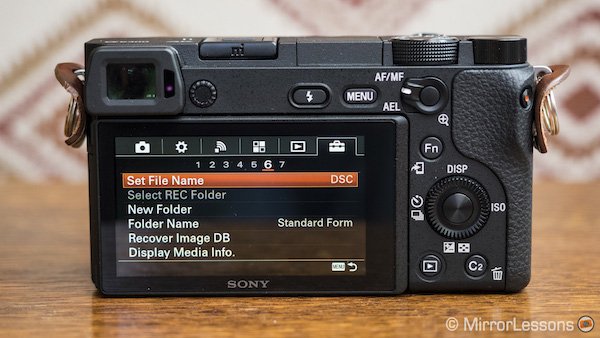
The a6300 gives you the possibility to specify the first three letters of the file name for your images, which isn’t possible on the a6000. Only capital letters, numbers, and underscores are permitted.
30. Battery life and USB power option
The a6300 and a6000 have a similar battery life when shooting stills. You can get an average of 300/350 shots with one battery but if you shoot intensively, you will need a second battery at least.
When shooting in continuous mode or recording video, both cameras drain the battery faster. The a6300 eats up even more battery life if you use the high frame rate for the EVF or when shooting 4K video.
The a6300 can be powered by USB (computer or external battery). You can also use the port to charge the battery.
On the a6000, you will need the optional AC-PW10AM AC Adaptor to use the camera while it is connected to the wall socket.
Conclusion
Although the Sony a6300 is the more technologically advanced of the two models, there is no getting around the fact that it is much more expensive. The truth is that you could buy two second-hand a6000 bodies for the price of one brand new a6300.
All the small differences aside, your choice really comes down to a couple of questions:
- Do you regularly shoot sports, wildlife or any kind of fast action?
- And do you need 4K video capabilities?
If the answer is ‘yes’ to either of these questions, the a6300 is the better choice. It has one of the most advanced autofocus systems we’ve seen on a mirrorless camera to date, and the uninterrupted live view of the EVF at up to 8fps burst speed is certainly a boon for fast action.
Being able to shoot 4K is also a big advantage for filmmakers because it gives you more leeway to crop your image in a Full HD timeline. And the fact that it records internally means that the compactness of the camera isn’t compromised by the bulk of external recorders.
For everything else, the a6000 is enough to do the job. It takes high-resolution 24MP still images just like the a6300, can shoot at 11fps in continuous AF with decent results, and supports movie recording in the XAVC S format thanks to a recent firmware update. Indeed, I wouldn’t be surprised if this model continues to dominate the best seller’s list for its unbeatable value.
Which of these two models would you choose? Have you come across any differences we haven’t? Let us know in the comments section!


