What is hi-res?
Your coworker asks for a photo, so you quickly email him the one from the web. Moments later, he replies back: “Do you have that in hi-res?”
Does it matter?
Yes; he’s not just being picky. There really is a difference between lo- and hi-res. It can determine whether your company logo looks fuzzy vs. crystal clear. In order to understand when a hi-res image is a must (such as for printing and enlarging), let’s go into what hi-res is in the first place.
You are my density
Hi-res stands for high resolution, or denser image quality. Images are made of tiny pixels (picture elements), or squares of color. You usually don’t notice individual pixels because they all blend together to form the picture that you recognize. But they’re there. You can see pixels when you zoom in really closely to a picture, or if you try to enlarge an image beyond what it can handle.
![]()
The lo-res image on the right looks great at its normal size (100%), but when we zoom in, it looks choppy. You can see why enlarging lo-res images gives blurry results.
This look is called “pixelated” because you can distinguish each pixel, in a block pattern. Those of us who pre-date smartphones might recall this distinctive, low-tech aesthetic from back in the day. Ah, the memories (retro video games, anyone?).

Early video games looked pixelated because they used minimal colors on purpose to preserve memory and processing power. Today, we usually only see pixelated images when images are enlarged or zoomed-in too much, or printed from a lo-res file.
Count your pixels
Lo-res images have around 72-pixels, or squares of color, per inch. This makes them great for the web, because that’s all your computer screen will display, anyhow. Plus, they are very lightweight (fewer pixels), so they help websites load quickly.
Hi-res images are at least 300 pixels per inch (ppi). This resolution makes for good print quality, and is pretty much a requirement for anything that you want hard copies of, especially to represent your brand or other important printed materials.

Prevent printing regrets (because ink is expensive)! Use hi-res photos for sharp prints and to prevent jagged lines. Hint: Make sure your phone-camera is taking a high enough resolution to look good when printed.
Is my image hi- or lo-res?
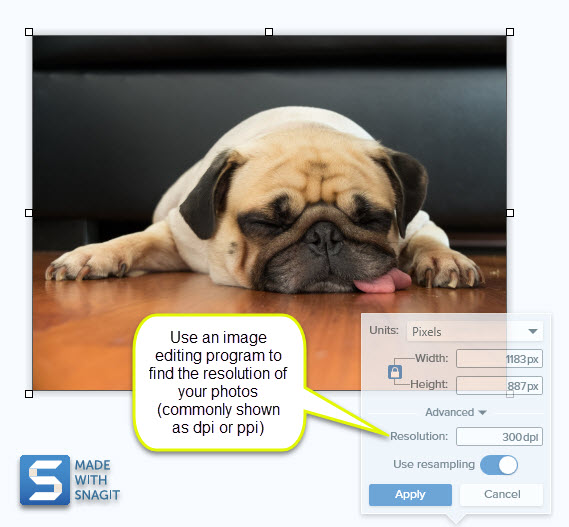
Just because it looks good on your computer screen doesn’t mean it’s hi-res. You can’t tell by the length-width dimensions, either. Heavy file size can be a clue, but not in all cases. The best way is to open up the picture in an image program and view the file properties. You don’t need a fancy program to do this; most computers come with a basic image editing program that will do the trick.

Lo-res for web, hi-res for print
This is just a broad overview, but if you take away one thing, it’s that the resolution you want depends on whether you want the file on-screen only, or print.
Resolution also helps you figure out how much you can enlarge a photo. This comes in handy when trying to figure out what size you can print something (4×6? 8×10?) and have it still look good. Rule of thumb: divide the pixel size (dimension) of the image by the resolution (at least 300 ppi) to get the maximum print size in inches. So, if your image is 2,000 pixels in length at 300 ppi, then you can print it up to six inches or so (2,000 divided by 300).
Hi-res files are a great thing. They have more pixels, are heavier, and are great for printing. They’re well worth the storage space and download time, and for making sure your pictures look great beyond your screen.
Want to find out if your image is hi-res? Snagit lets you easily view image resolutions of 28 popular formats, plus you can resize and edit. Get your free trial.


